Configure the Amazon Web Services (AWS) cloud provider
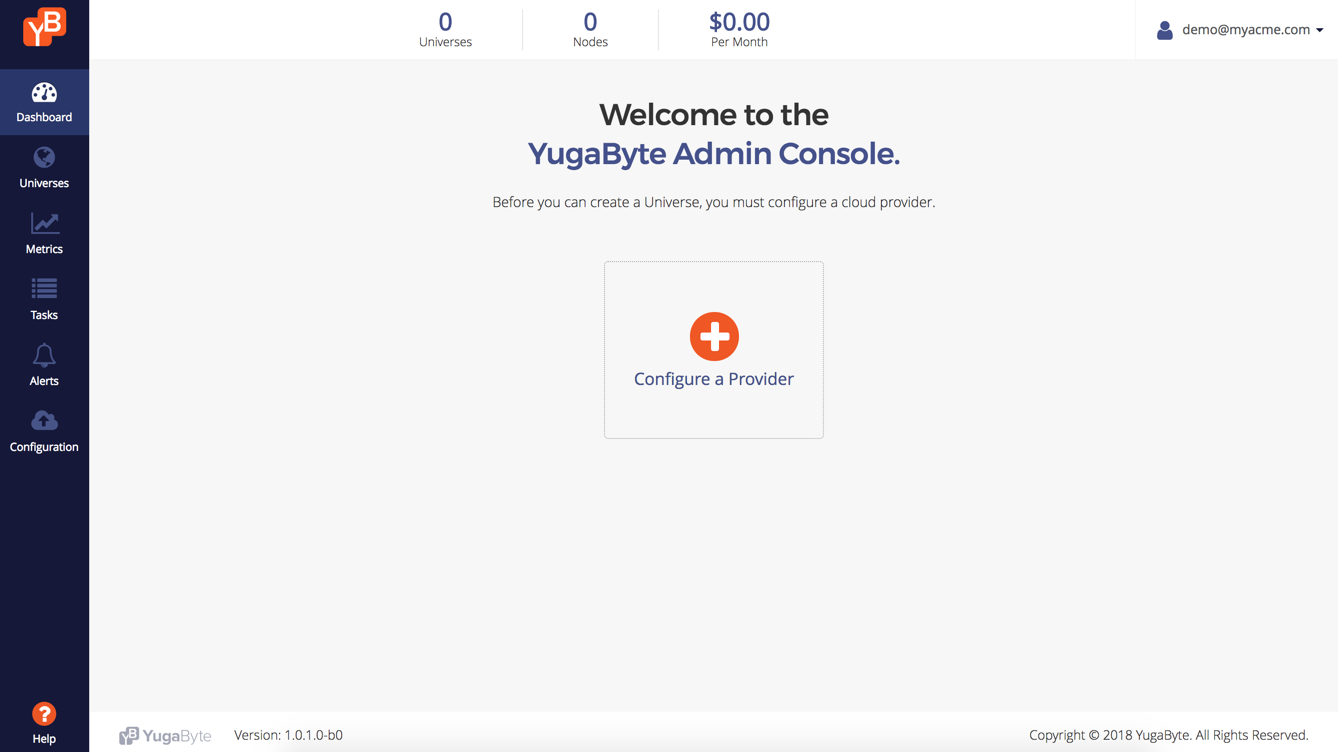
This page details how to configure Amazon Web Services (AWS) for YugabyteDB using the Yugabyte Platform console. If no cloud providers are configured, the main Dashboard page highlights that you need to configure at least one cloud provider.
Prerequisites
Amazon Web Services (AWS)
To run YugabyteDB nodes on Amazon Web Services (AWS), you need to provide your cloud provider credentials on the Yugabyte Platform console. Yugabyte Platform uses the credentials to automatically provision and deprovision YugabyteDB instances. A YugabyteDB instance includes a compute instance as well as attached local or remote disk storage.
Configure AWS
Configuring the Yugabyte Platform to deploy universes in AWS provides several options for you to tweak, depending on your preferences:
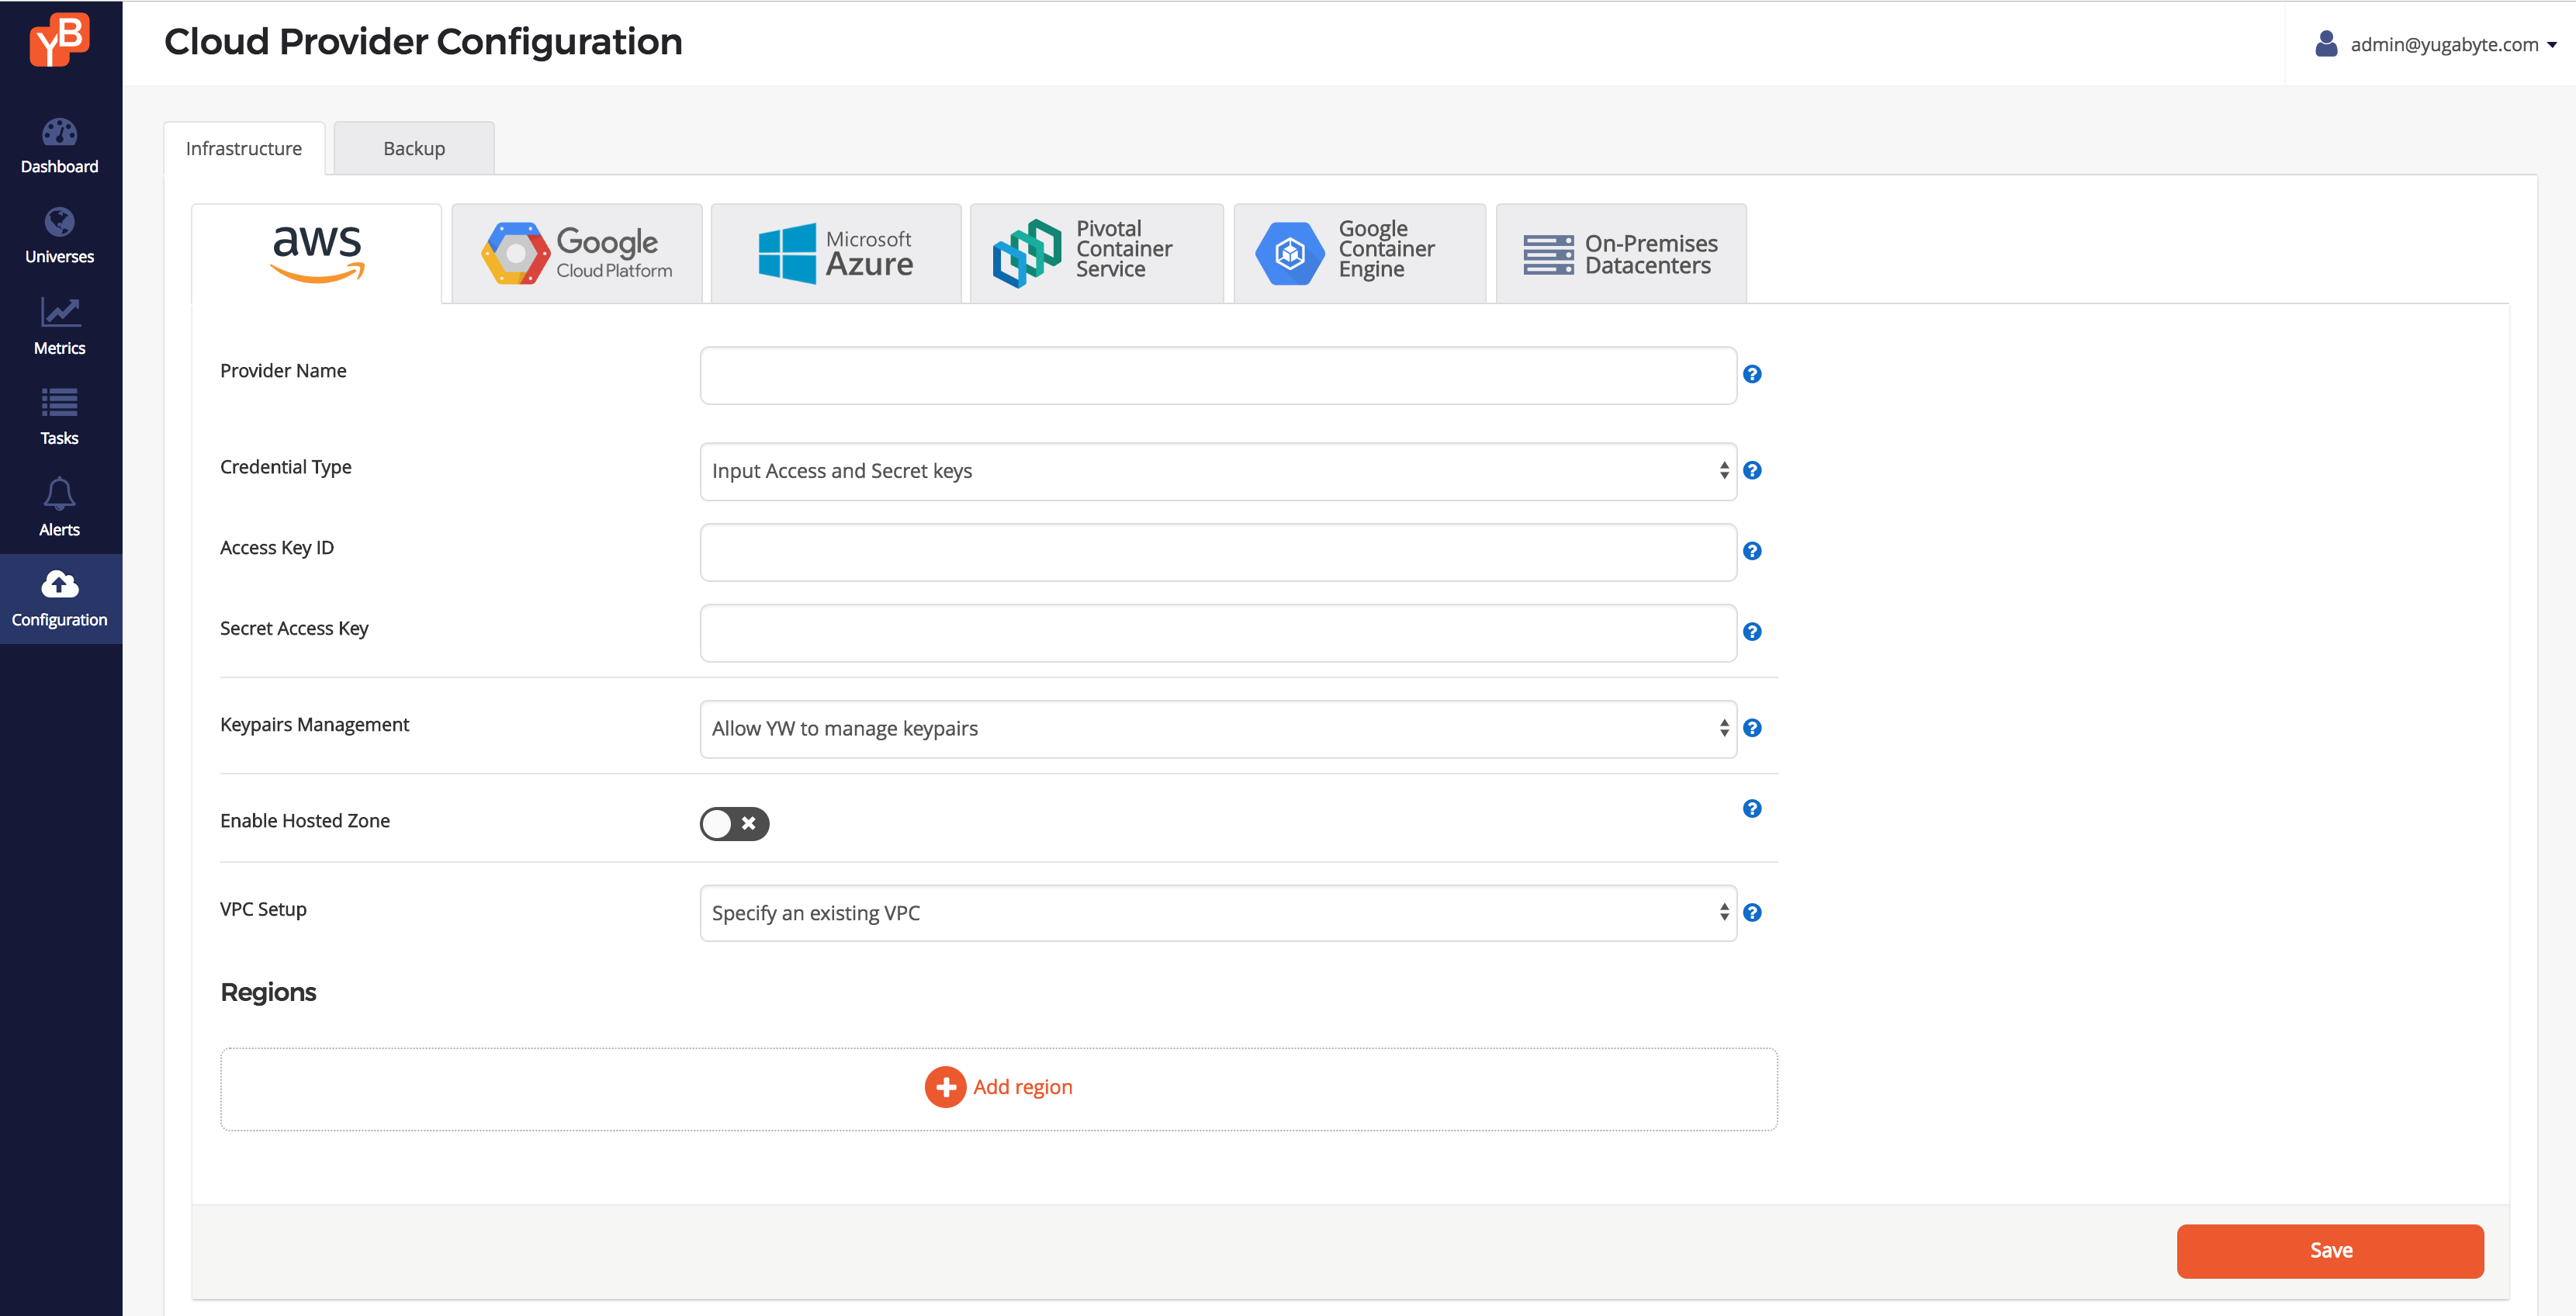
Provider name
This is an internal tag used for organizing your providers, so you know where you want to deploy your YugabyteDB universes.
Credentials
In order to actually deploy YugabyteDB nodes in your AWS account, the Yugabyte Platform will require access to a set of cloud credentials. These can be provided in one of the following ways:
- Directly provide your AWS Access Key ID and Secret Key
- Attach an IAM role to the Yugabyte Platform VM in the EC2 tab. For more information, see Deploy the YugabyteDB universe using an IAM role .
SSH Key Pairs
In order to be able to provision EC2 instances with YugabyteDB, the Yugabyte Platform requires SSH access. Here are two ways to provide SSH access:
- Enable Yugabyte Platform to create and manage Key Pairs. In this mode, the Yugabyte Platform will create SSH Key Pairs across all the regions you choose to set up and store the relevant private key part of these locally in order to SSH into future EC2 instances.
- Use your own existing Key Pairs. To do this, provide the name of the Key Pair as well as the private key content and the corresponding SSH user. Currently, this information must be the same across all the regions you choose to provision!
Enabling hosted zones
Integrating with hosted zones can make YugabyteDB universes easily discoverable. The Yugabyte Platform can integrate with Amazon Route53 to provide managed CNAME entries for your YugabyteDB universes, which will be updated as you change the set of nodes to include all relevant ones for each of your universes.
Global deployment
For deployment, the Yugabyte Platform aims to provide you with easy access to the many regions that AWS makes available globally. To that end, it allows you to select which regions you wish to deploy to and supports two different ways of configuring your setup, based on your environment:
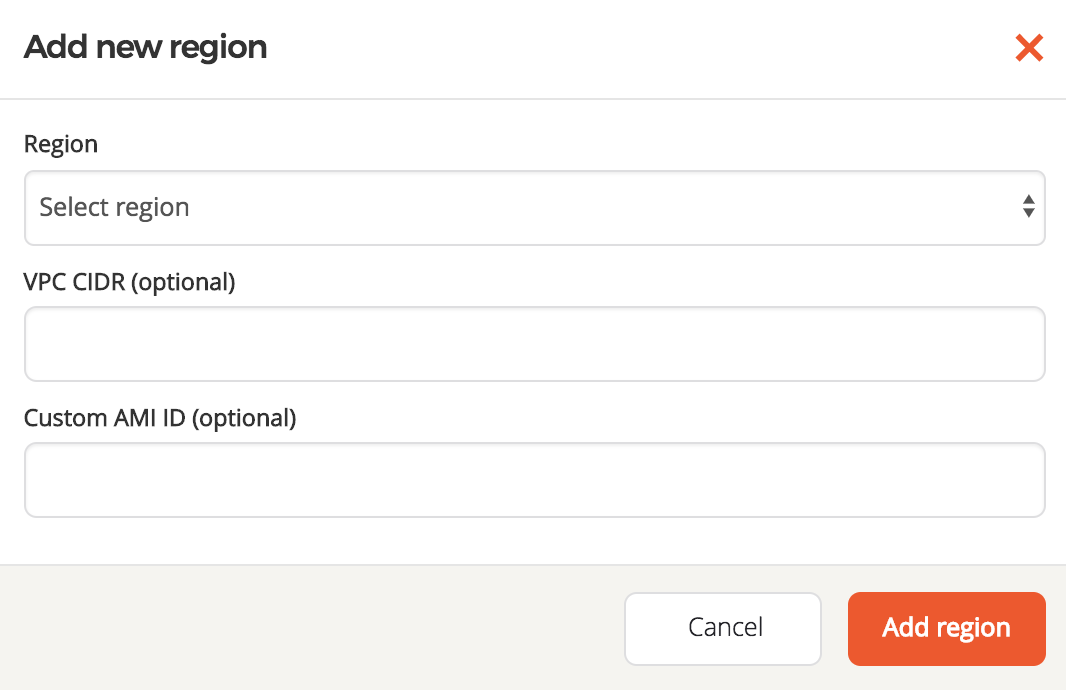
Yugabyte Platform-managed configuration
If you choose to use the Yugabyte Platform to configure, own, and manage a full cross-region deployment of VPCs, it will generate a YugabyteDB-specific VPC in each selected region, then interconnect them, as well as the VPC in which the Yugabyte Platform was deployed, using VPC Peering. This mode also sets up all other relevant subcomponents in all regions, such as Subnets, Security Groups, and Routing Table entries. Some notes:
- (Optional) Provide a custom CIDR block for each regional VPC, else we will choose some sensible defaults internally, aiming to not overlap across regions.
- (Optional) Provide a custom AMI ID to use in each region; otherwise use a recent AWS Marketplace CentOS AMI.
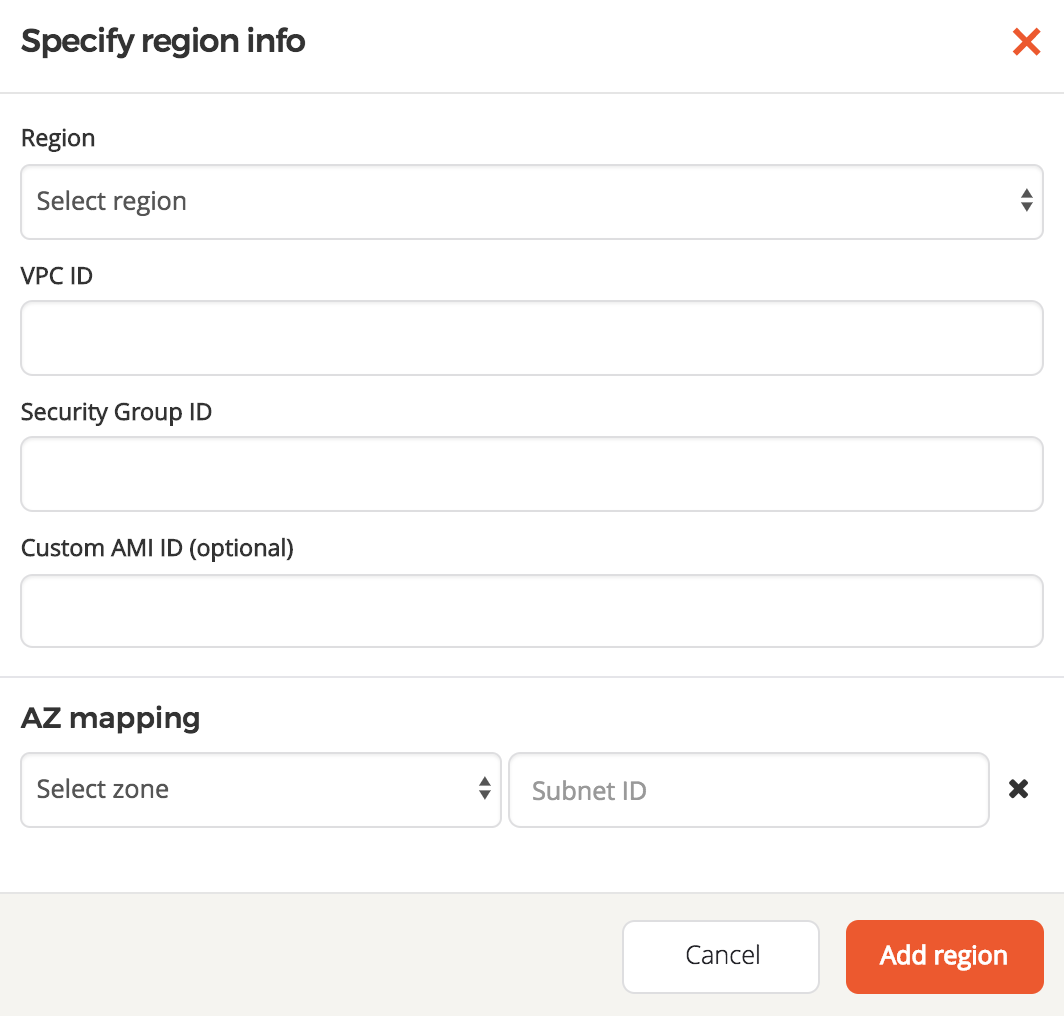
Self-managed configuration
Using your own custom VPCs is supported. This allows you the highest level of customization for your VPC setup:
- Provide a VPC ID to use for each region.
- Provide a Security Group ID to use for each region. This will be attached to all YugabyteDB nodes and must allow traffic from all other YugabyteDB nodes, even across regions, if you deploy across multiple regions.
- Provide the mapping of what Subnet IDs to use for each Availability Zone in which you wish to be able to deploy. This is required to ensure the Yugabyte Platform can deploy nodes in the correct network isolation that you desire in your environment.
- (Optional) Provide a custom AMI ID to use in each region; otherwise, use a recent AWS Marketplace CentOS AMI.
If you choose to provide your own VPC information: you are responsible for having preconfigured networking connectivity. For single-region deployments, this might simply be a matter of region or VPC local Security Groups. Across regions, however, the setup can get quite complex. Yugabyte suggests using the VPC peering feature of Amazon Virtual Private Cloud (Amazon VPC) to set up private IP connectivity between nodes located across regions:
- VPC Peering Connections must be established in an N x N matrix, such that every VPC in every region you configure must be peered to every other VPC in every other region.
- Routing Table entries in every regional VPC should route traffic to every other VPC CIDR block across the PeeringConnection to that respective VPC. This must match the Subnets that you provided during the configuration step.
- Security Groups in each VPC can be hardened by only opening up the relevant ports to the CIDR blocks of the VPCs from which you are expecting traffic.
- If you deploy Yugabyte Platform in a different VPC than the ones in which you intend to deploy YugabyteDB nodes, then its own VPC must also be part of this cross-region VPC mesh, as well as setting up Routing Table entries in the source VPC (Yugabyte Platform) and allowing one further CIDR block (or public IP) ingress rule on the Security Groups for the YugabyteDB nodes (to allow traffic from the Yugabyte Platform or its VPC).
- When a public IP address is not enabled on a universe, a network address translation (NAT) gateway or device is required. You must configure the NAT gateway before creating the VPC that you add to the Yugabyte Platform console. For more information, see NAT and Tutorial: Creating a VPC with Public and Private Subnets for Your Clusters in the AWS documentation.
Final notes
If you use the Yugabyte Platform to manage SSH Key Pairs for you and you deploy multiple Yugabyte Platform instances across your environment, then the AWS Provider name should be unique for each instance of Yugabyte Platform integrating with a given AWS Account.
Marketplace acceptance
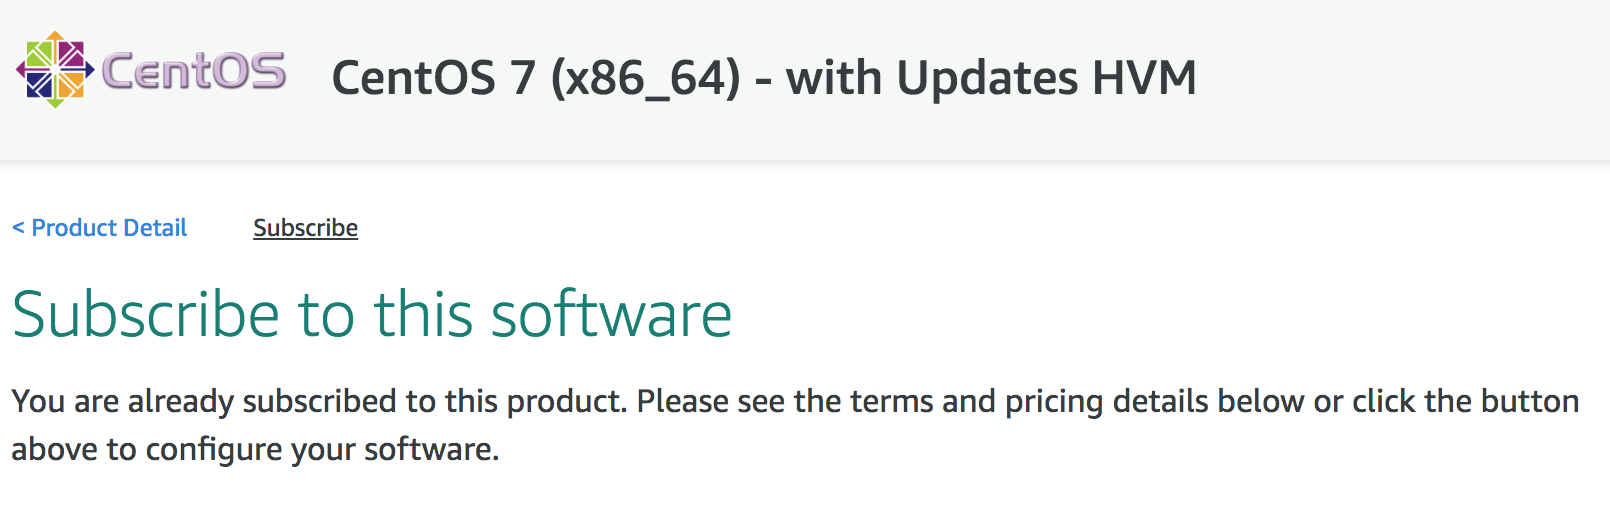
Finally, if you did not provide your own custom AMI IDs, before we can proceed to creating a universe, verify that you can actually spin up EC2 instances with the default AMIs in Yugabyte Platform. The reference AMIs come from a Marketplace CentOS 7 Product. While logged into your AWS account, go to that link and click Continue to Subscribe.
If you are not already subscribed and have thus not accepted the Terms and Conditions, then you should see something like this:

If so, click the Accept Terms button and wait for the page to switch to a successful state. Once the operation completes, or if you previously subscribed and accepted the terms, you should see the following:
Now, you are ready to create a YugabyteDB universe on AWS.
Next step
You are now ready to create YugabyteDB universes as outlined in the next section.