Hasura
Use the Hasura GraphQL Engine with YugabyteDB to power your GraphQL applications with a distributed SQL database.
Follow the steps below to begin using Hasura with YugabyteDB. For details on using Hasura, see the Hasura GraphQL engine documentation.
Before you begin
Install and start YugabyteDB
You can be up and running with YugabyteDB in under five minutes by following the steps in Quick start.
PostgreSQL-compatible YSQL API is now available to serve application client requests at localhost:5433.
Install and start Hasura
To install the Hasura GraphQL engine on an existing PostgreSQL database, follow the steps in the Hasura Quick start with Docker.
To use Hasura with YugabyteDB, the configuration should be similar to PostgreSQL, except that the port should be 5433.
For a local Mac setup, the configuration should be:
docker run -d -p 8080:8080 \
  -e HASURA_GRAPHQL_DATABASE_URL=postgres://postgres:@host.docker.internal:5433/yugabyte \
  -e HASURA_GRAPHQL_ENABLE_CONSOLE=true \
  hasura/graphql-engine:v2.0.0
Note
- v2.0.0 refers to the version of
hasura/graphql-engineyou are using, you can change it to a different version as per your needs. @host.docker.internal:5433is a directive to Hasura to connect to the 5433 port of the host that is running the Hasura container.
Create sample tables and relationships
Follow the steps below to add tables to the yugabyte database specified in the configuration above.
You can use another database, if you want, but make sure to change the database name in the HASURA_GRAPHQL_DATABASE_URL setting.
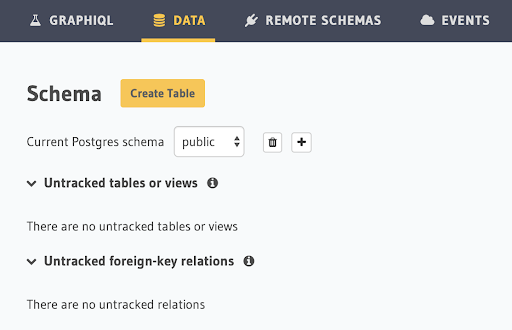
To perform the steps below, open the Hasura UI on http://localhost:8080 and go to the DATA tab as shown here.
1. Create the author table
Click Create Table and fill in the details as below to create a table author(id, name).
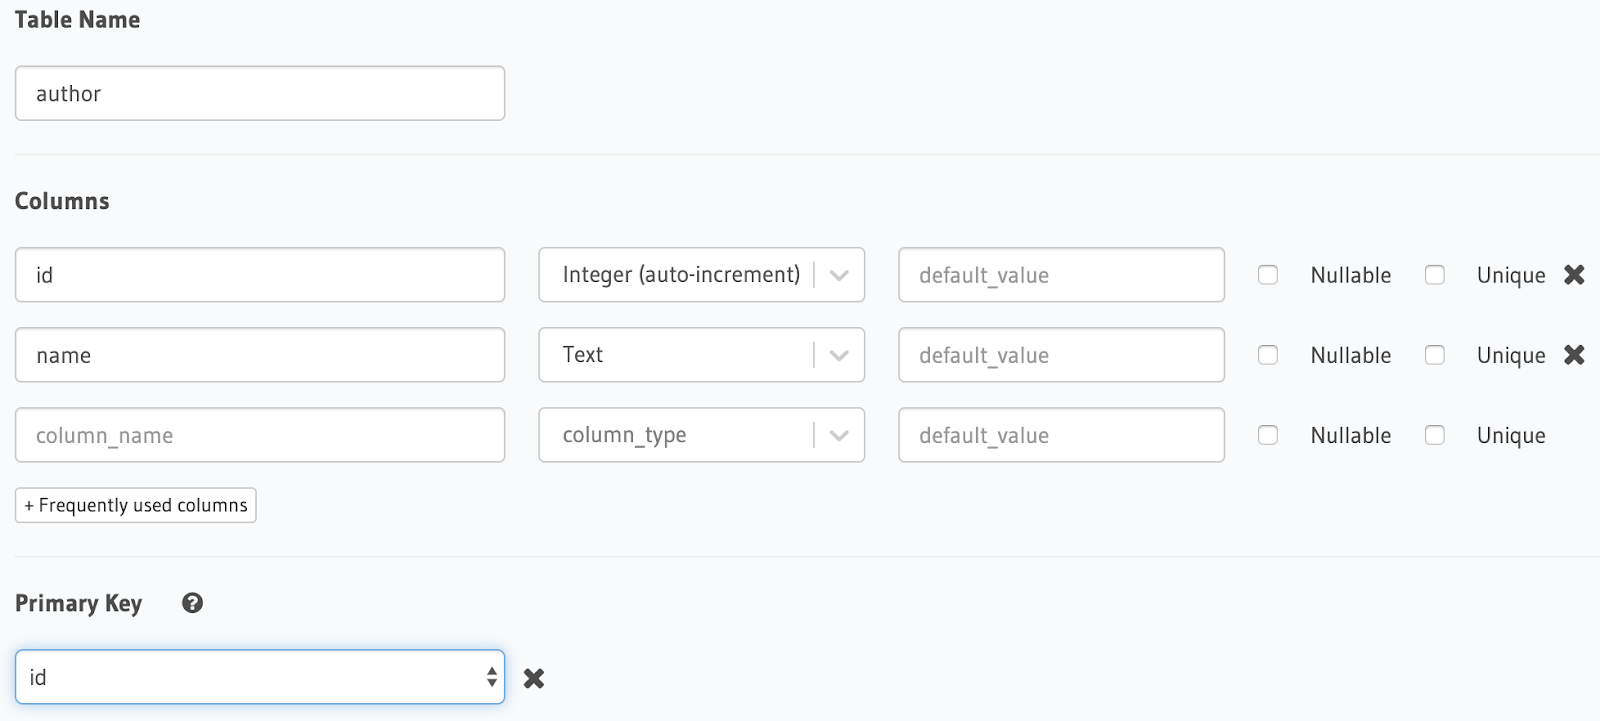
After filling in details, click Add Table at the bottom, then go back to the DATA tab.
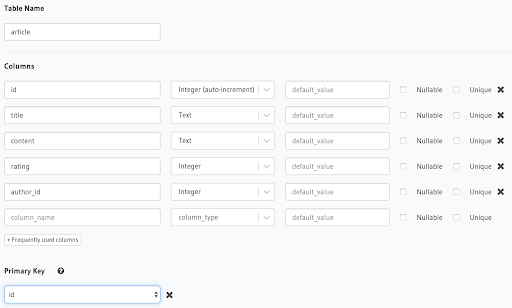
2. Create the article table
Click Create Table again to create a table article(id, title, content, rating, author_id), with a foreign key reference to author.
Fill in the details as shown here.
Under Foreign Keys, click Add a foreign key and fill in as shown here.
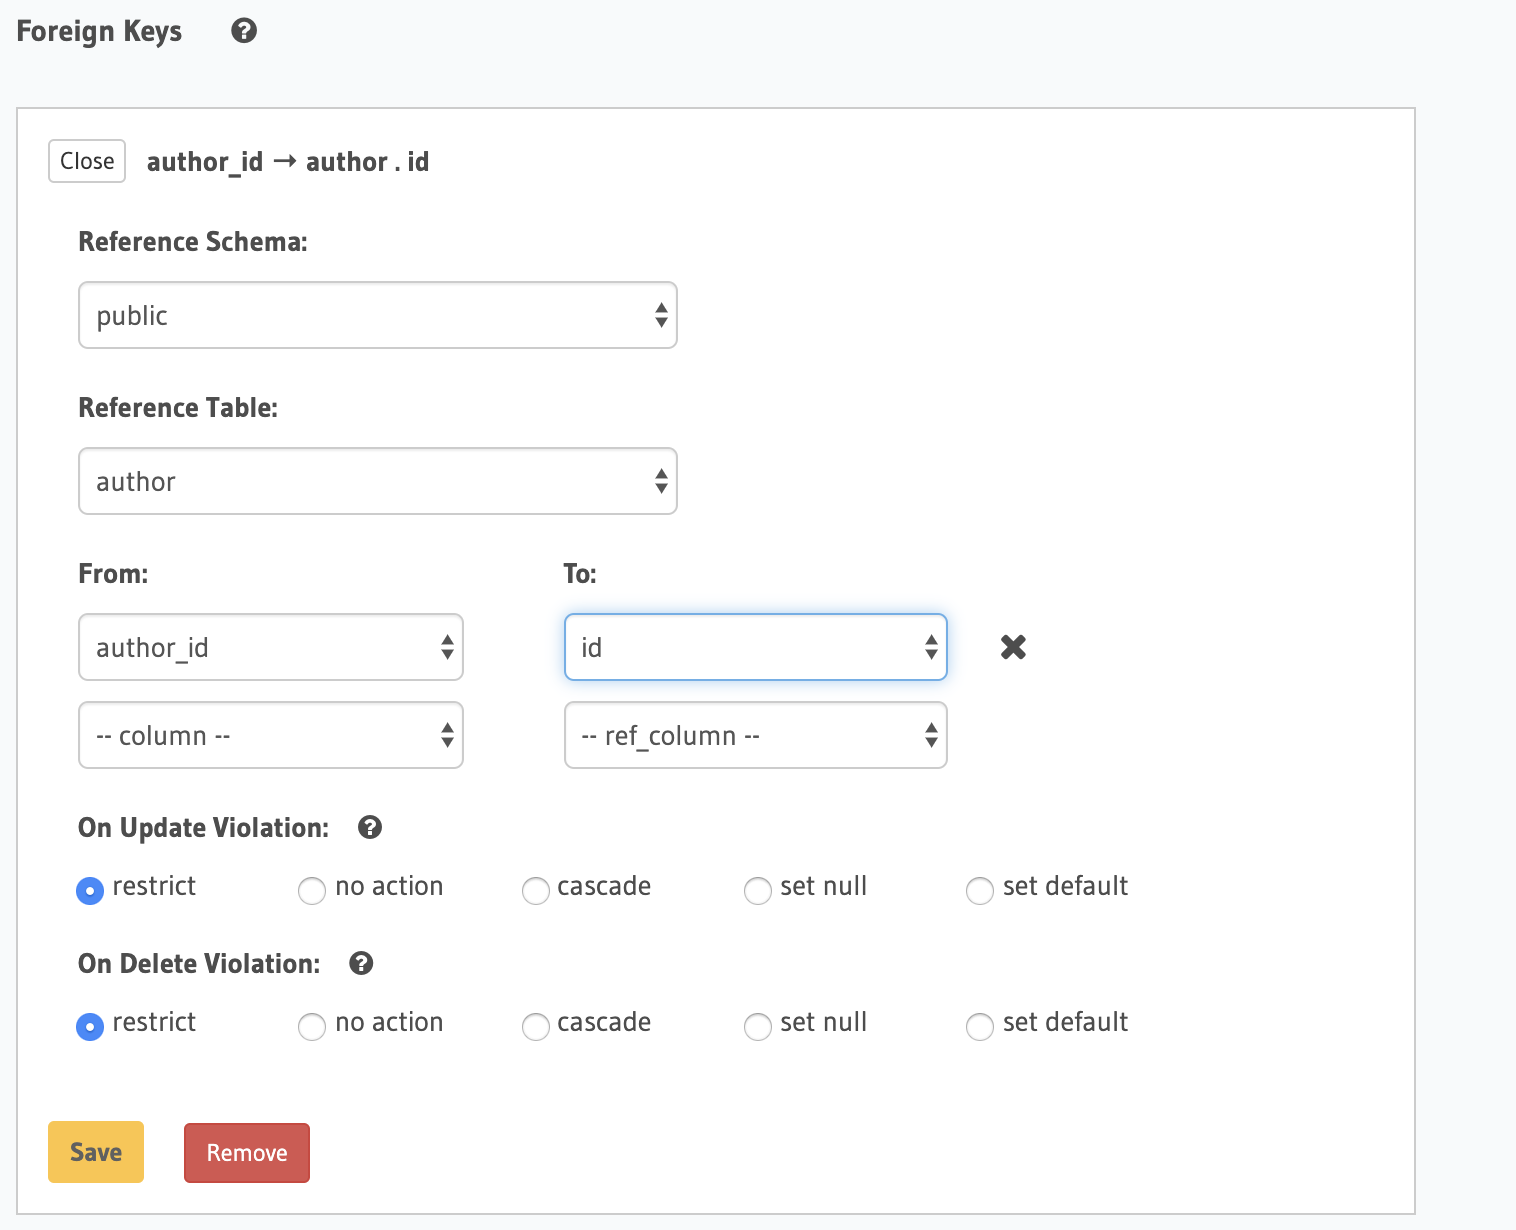
After completing the entries, click Save for the foreign key constraint, and then click Add Table at the bottom. Then go back to the DATA tab.
3. Create an object relationship
- Go to the article table on the left-side menu, then click the Relationships tab.
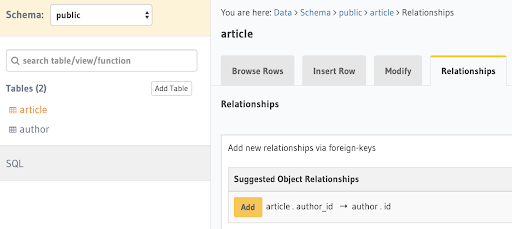
- Click Add, and then click Save.
4. Create an array relationship
Now go to the author table's Relationship tab.
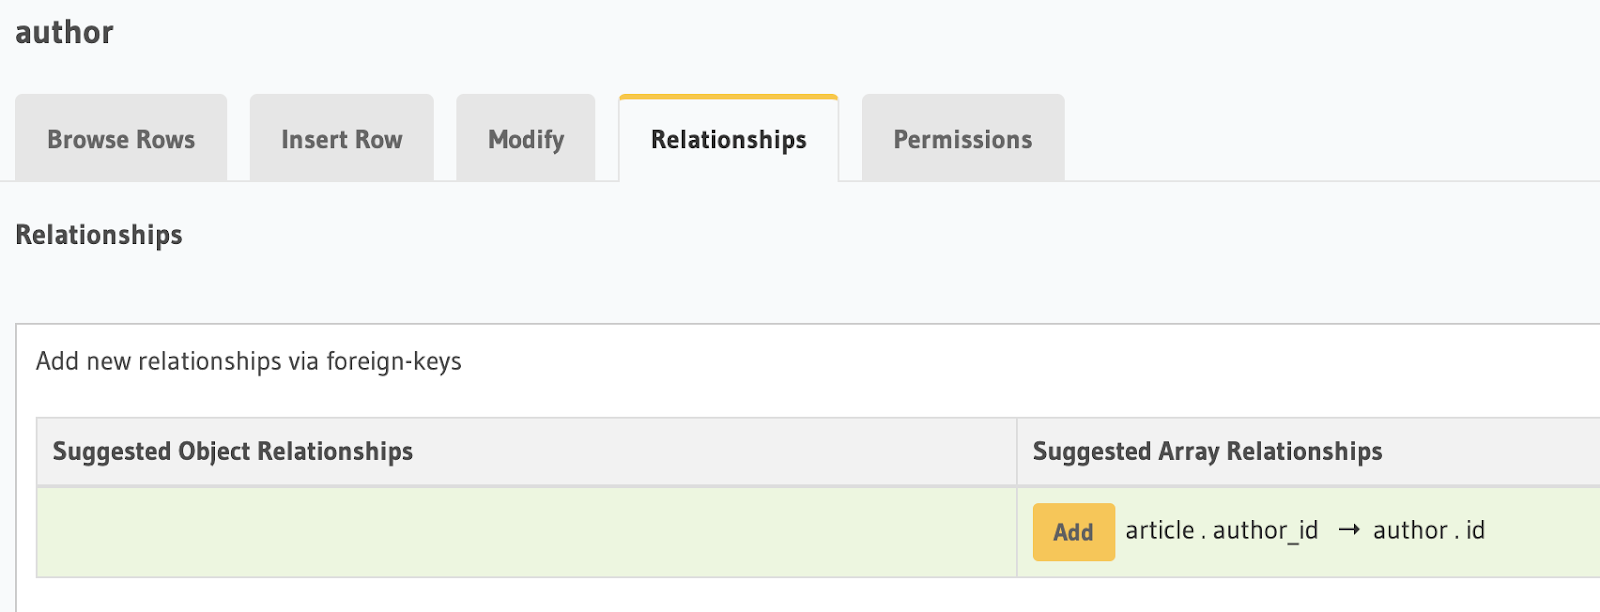
Click Add, and then click Save.
5. Load sample data
- On the command line, change your directory to the root
yugabytedirectory, and then openysqlsh(the YSQL CLI) to connect to the YugabyteDB cluster:
$ ./bin/ysqlsh
- Copy the YSQL statements below into the shell and press Enter.
INSERT INTO author(name) VALUES ('John Doe'), ('Jane Doe');
INSERT INTO article(title, content, rating, author_id)
VALUES ('Jane''s First Book', 'Lorem ipsum', 10, 2);
INSERT INTO article(title, content, rating, author_id)
VALUES ('John''s First Book', 'dolor sit amet', 8, 1);
INSERT INTO article(title, content, rating, author_id)
VALUES ('Jane''s Second Book', 'consectetur adipiscing elit', 7, 2);
INSERT INTO article(title, content, rating, author_id)
VALUES ('Jane''s Third Book', 'sed do eiusmod tempor', 8, 2);
INSERT INTO article(title, content, rating, author_id)
VALUES ('John''s Second Book', 'incididunt ut labore', 9, 1);
SELECT * FROM author ORDER BY id;
SELECT * FROM article ORDER BY id;
Run some GraphQL queries
Go back to the Hasura UI and click GRAPHIQL.
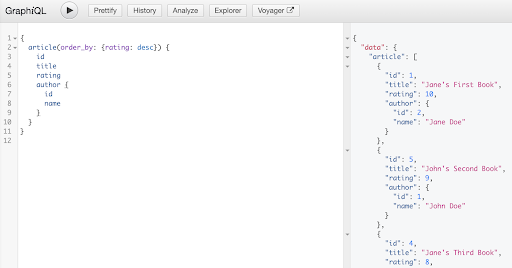
Query using the object relationship
Fetch a list of articles and sort each article’s author in descending order and by rating.
{
  article(order_by: {rating: desc}) {
    id
    title
    author {
      id
      name
    }
  }
}
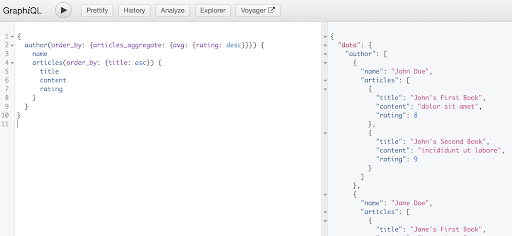
Query using the array relationship
Fetch a list of authors and a nested list of each author’s articles where the authors are ordered by descending by the average ratings of their articles, and their article lists are ordered by title.
{
  author(order_by: {articles_aggregate: {avg: {rating: desc}}}) {
    name
    articles(order_by: {title: asc}) {
      title
      content
      rating
    }
  }
}
Clean up
Now that you're done with this exploration, you can clean up the pieces for your next adventure.
-
Stop the YugabyteDB cluster by running the
yb-ctl stopcommand../bin/yb-ctl stopNote: To completely remove all YugabyteDB data/cluster-state you can instead run:
./bin/yb-ctl destroy -
Stop The Hasura container,
docker stop <container-id>You can list running containers using the following command:
docker ps