Create a read replica cluster
This section will describe how to create a universe that includes both a primary cluster and a read replica cluster in a hybrid cloud deployment, as well as dynamically add, edit, and remove a read replica cluster. In this example, you are first going to deploy a universe with primary cluster in Oregon (US-West) and read replica cluster in Northern Virginia (US-East).
Create the universe
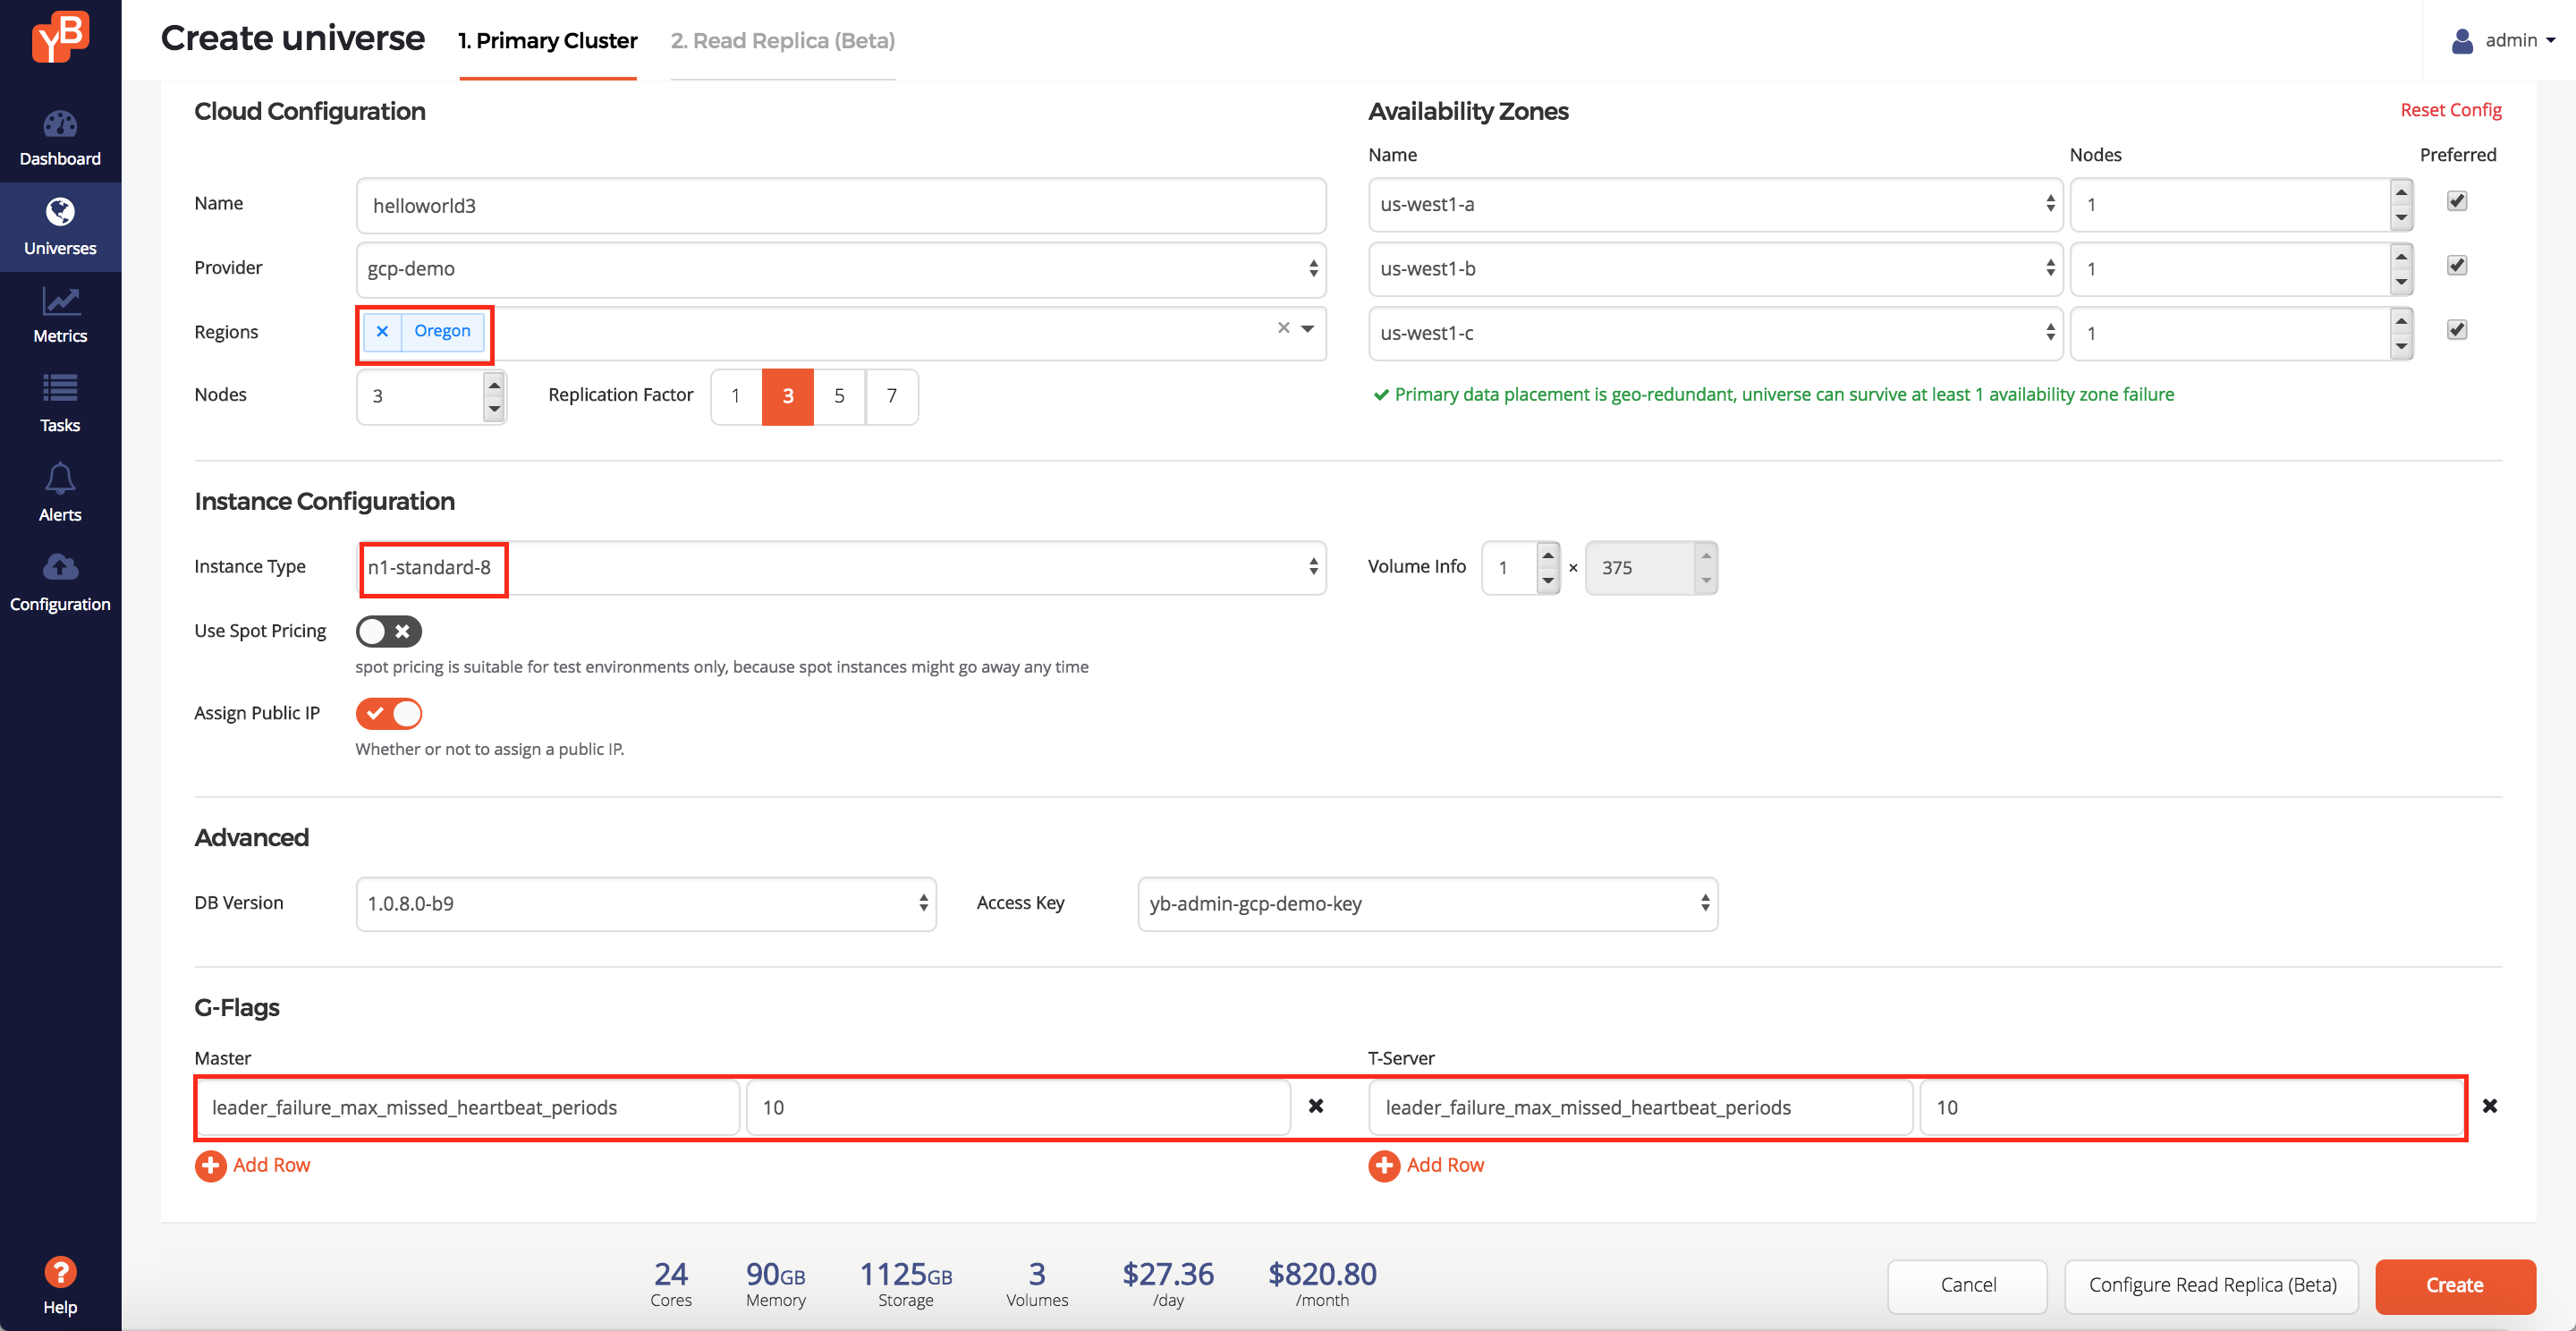
First, enter the following values to create a primary cluster on GCP provider. Click Create Universe and then enter the following intent.
- Enter a universe name: helloworld3
- Enter the set of regions: Oregon
- Enter the replication factor: 3
- Change instance type: n1-standard-8
- Add the following configuration flag for YB-Master and YB-TServer:
leader_failure_max_missed_heartbeat_periods = 10. Since the the data is globally replicated, RPC latencies are higher. You can use this flag to increase the failure detection interval in such a higher RPC latency deployment.
Then, click Configure Read Replica and then enter the following intent to create a read replica cluster on AWS.
- Enter the set of regions: US East
- Enter the replication factor: 3
- Change the instance type: c4.large
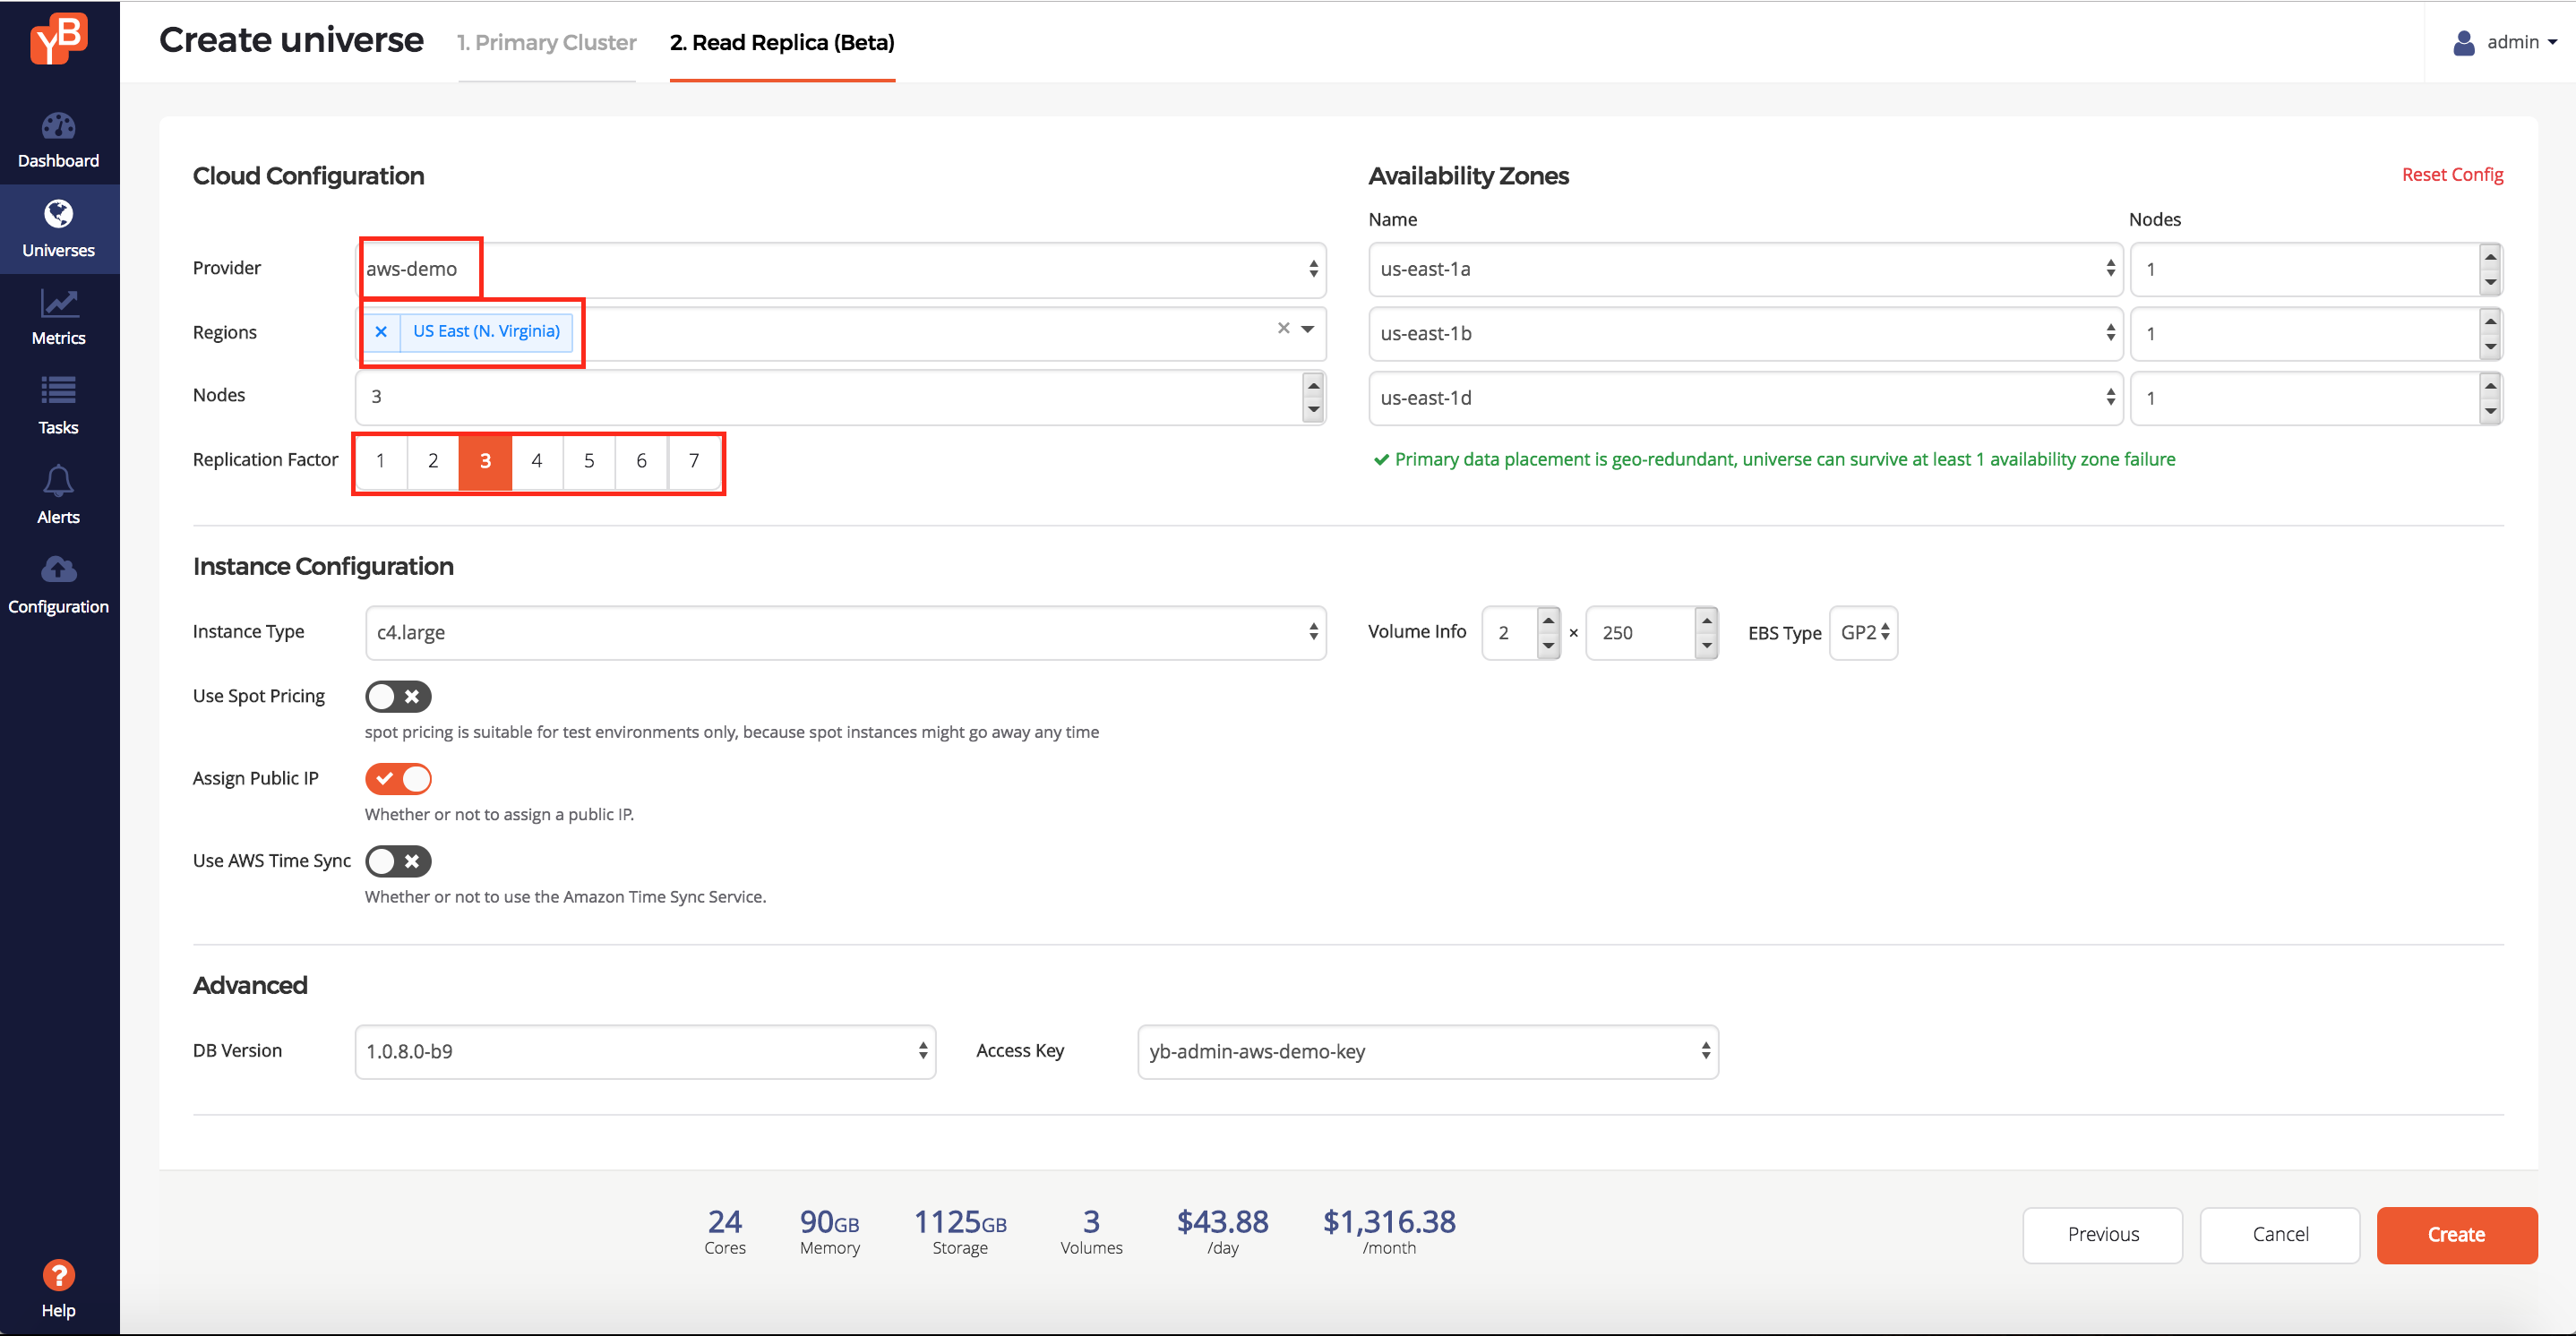
Since you do not need to a establish a quorum for read replica clusters, the replication factor can be either even or odd. Click Create.
Examine the universe
While waiting for the universe to get created, it should look like this:
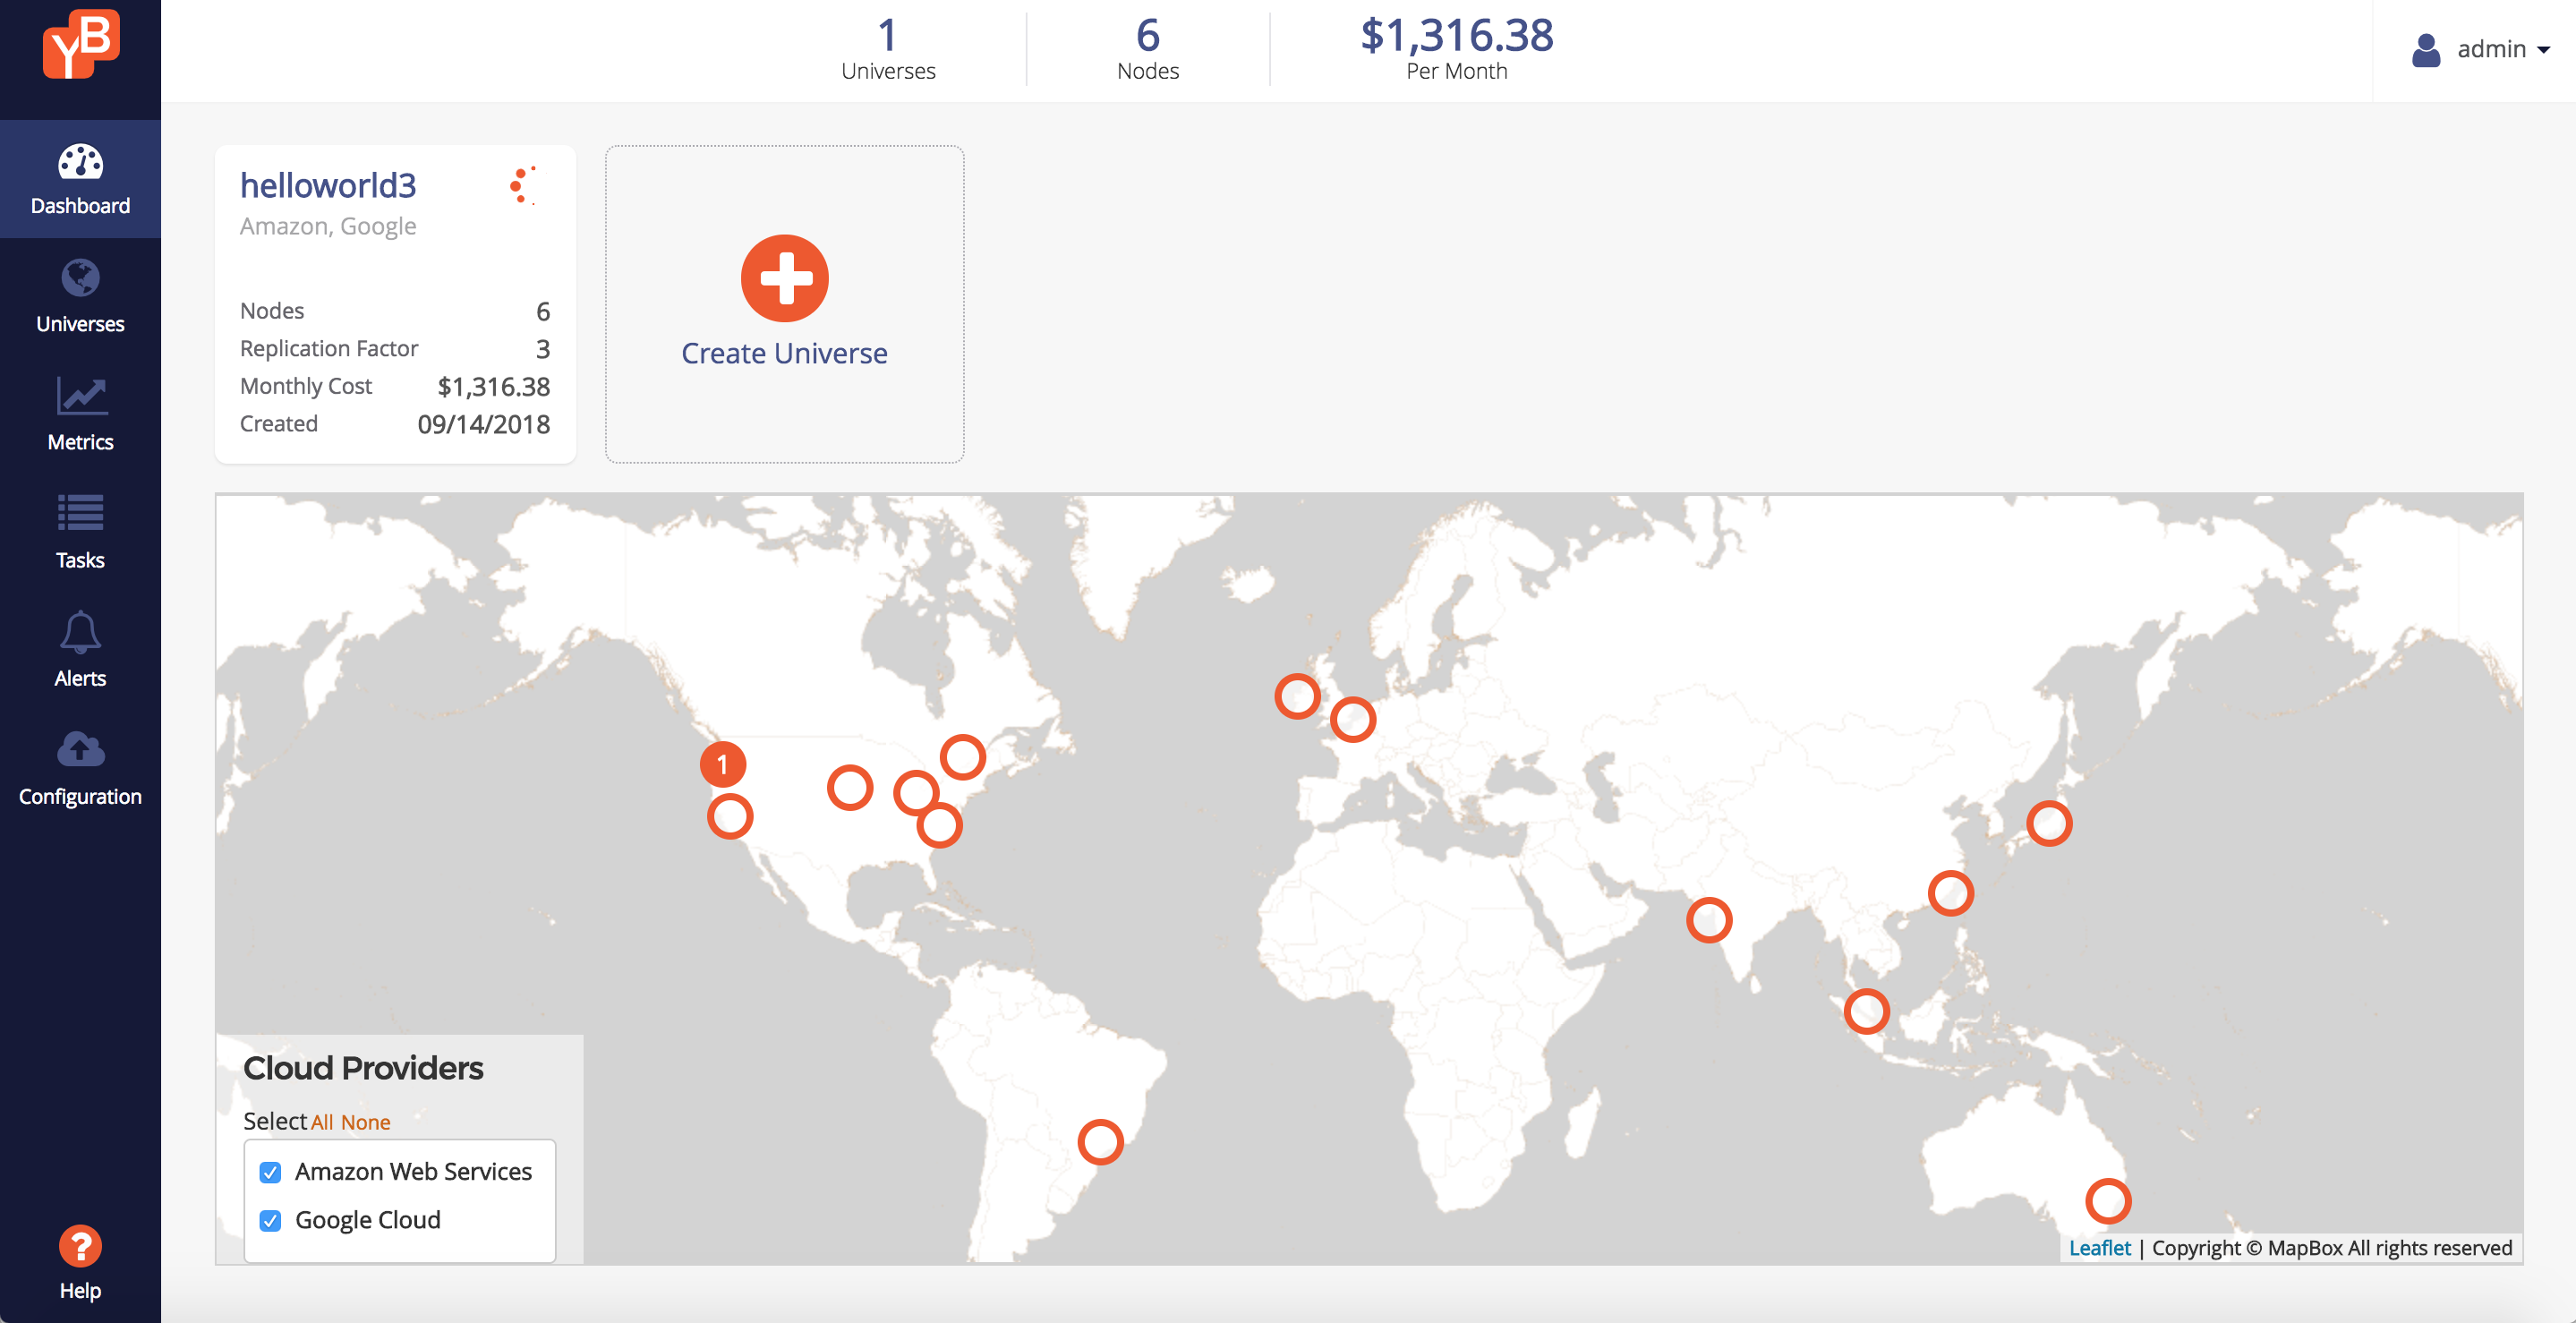
Once the universe is created, you should see something like this in the Universe Overview tab.

Note how you have a distinguished primary and read replica cluster defined, designated by the yellow and green groups respectively.
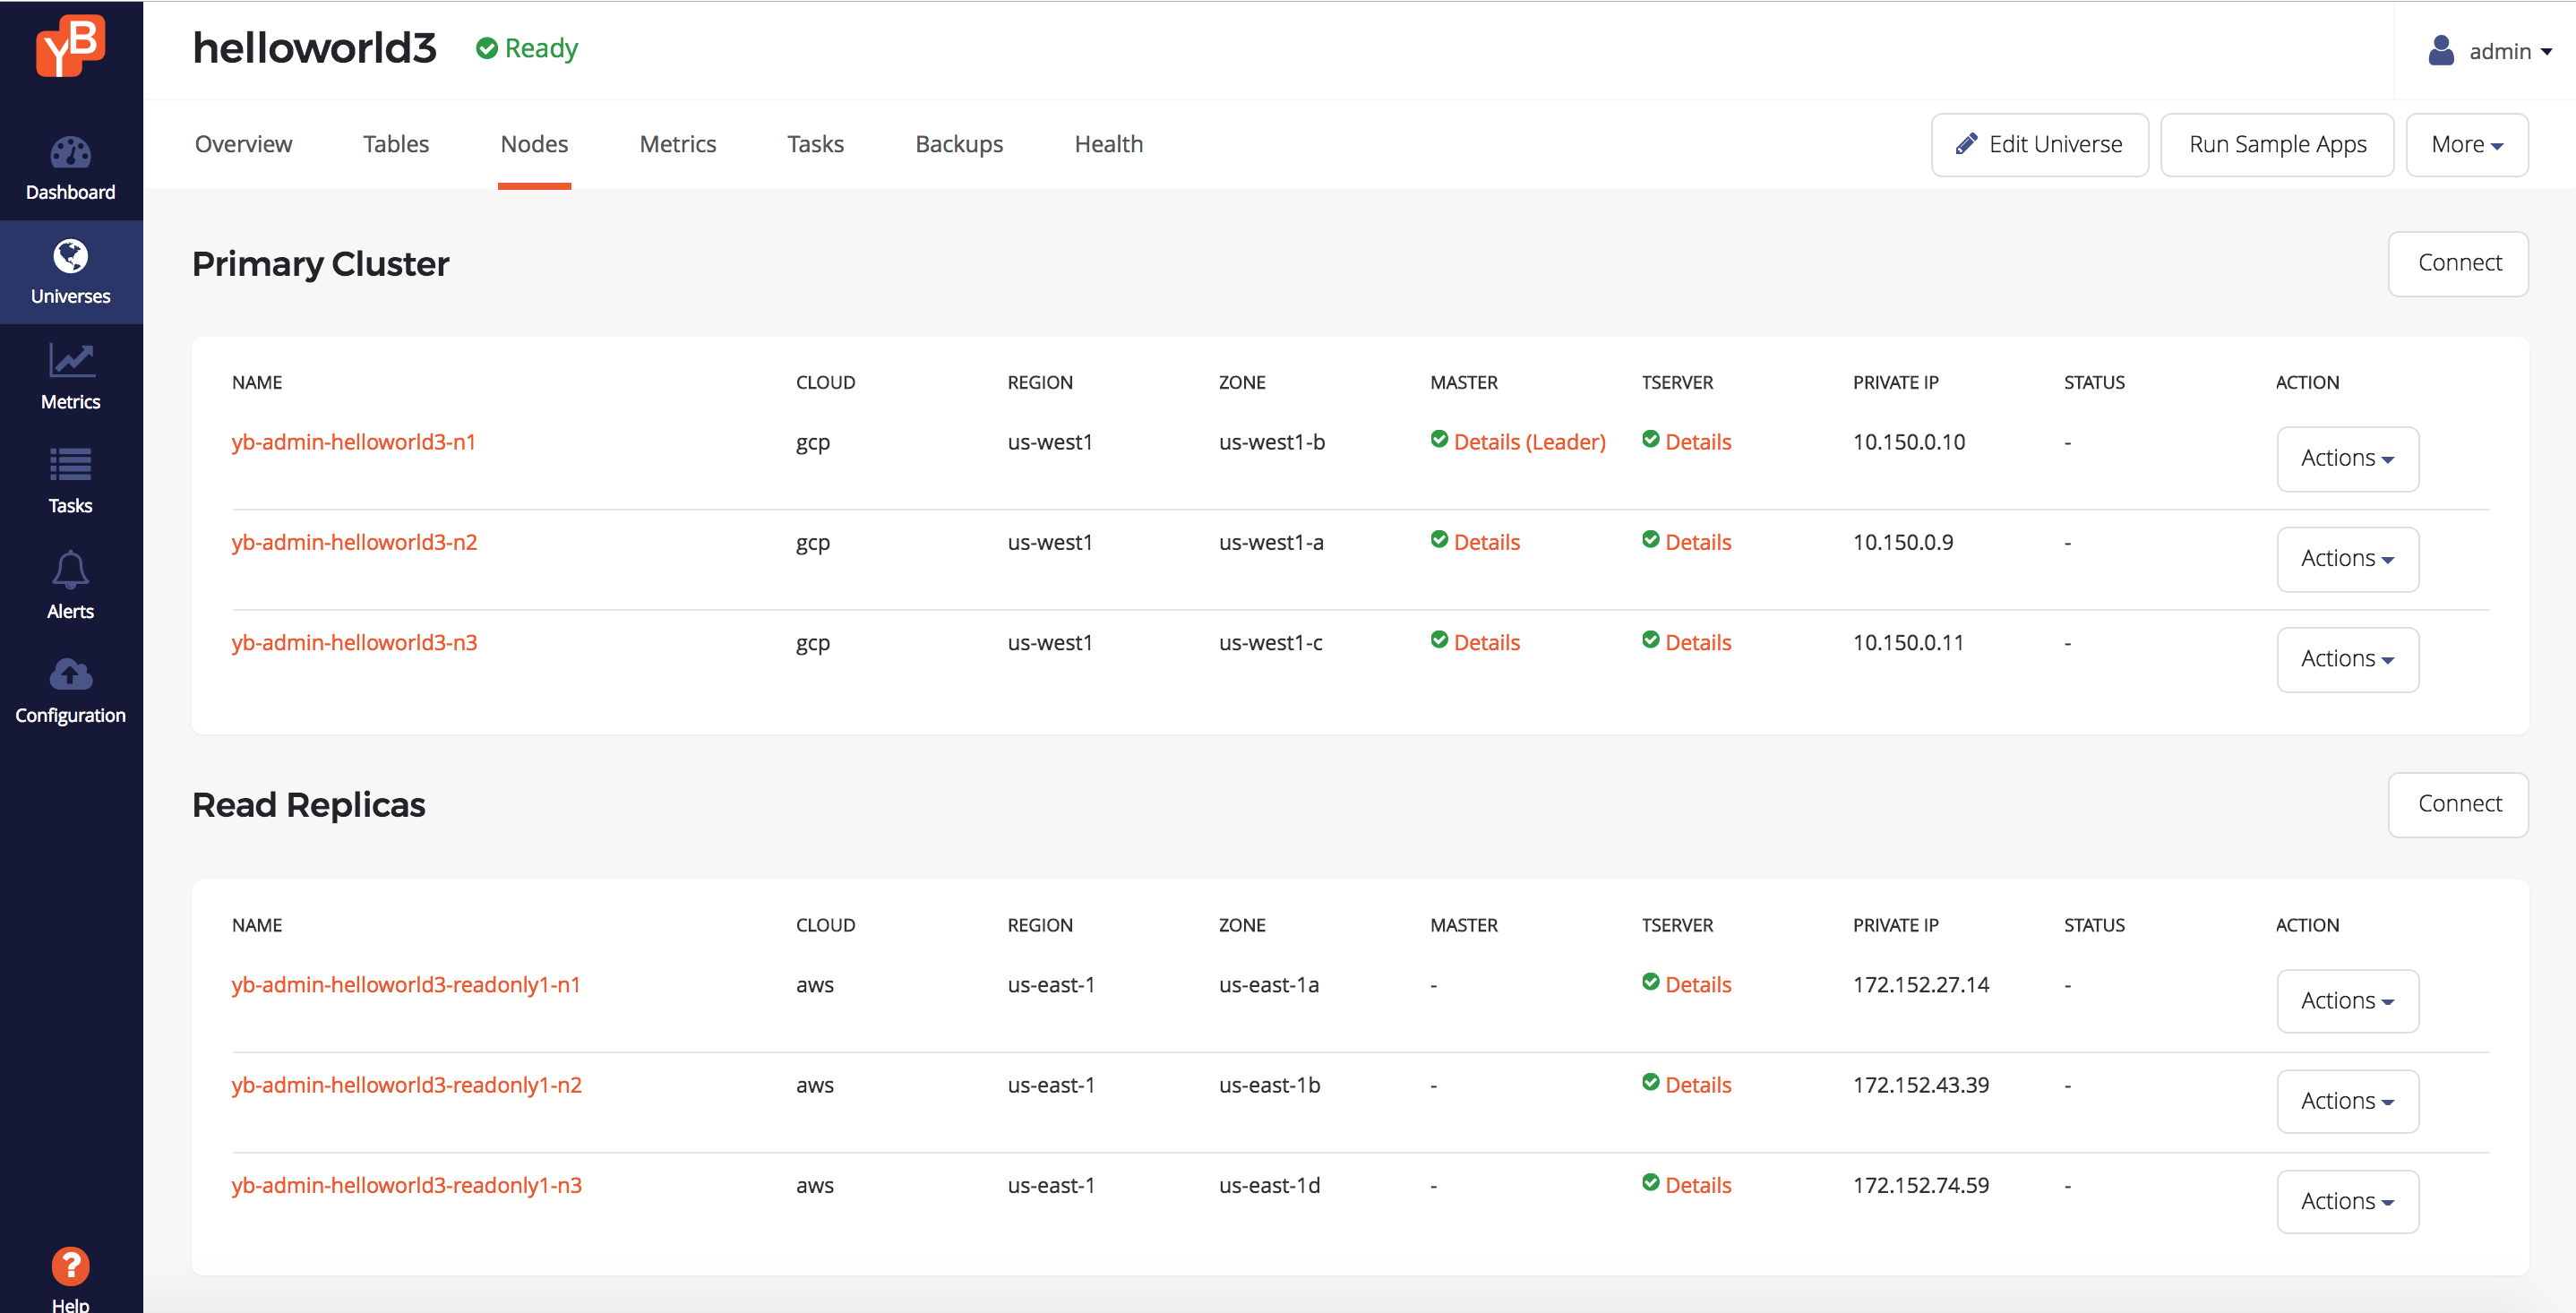
Universe nodes
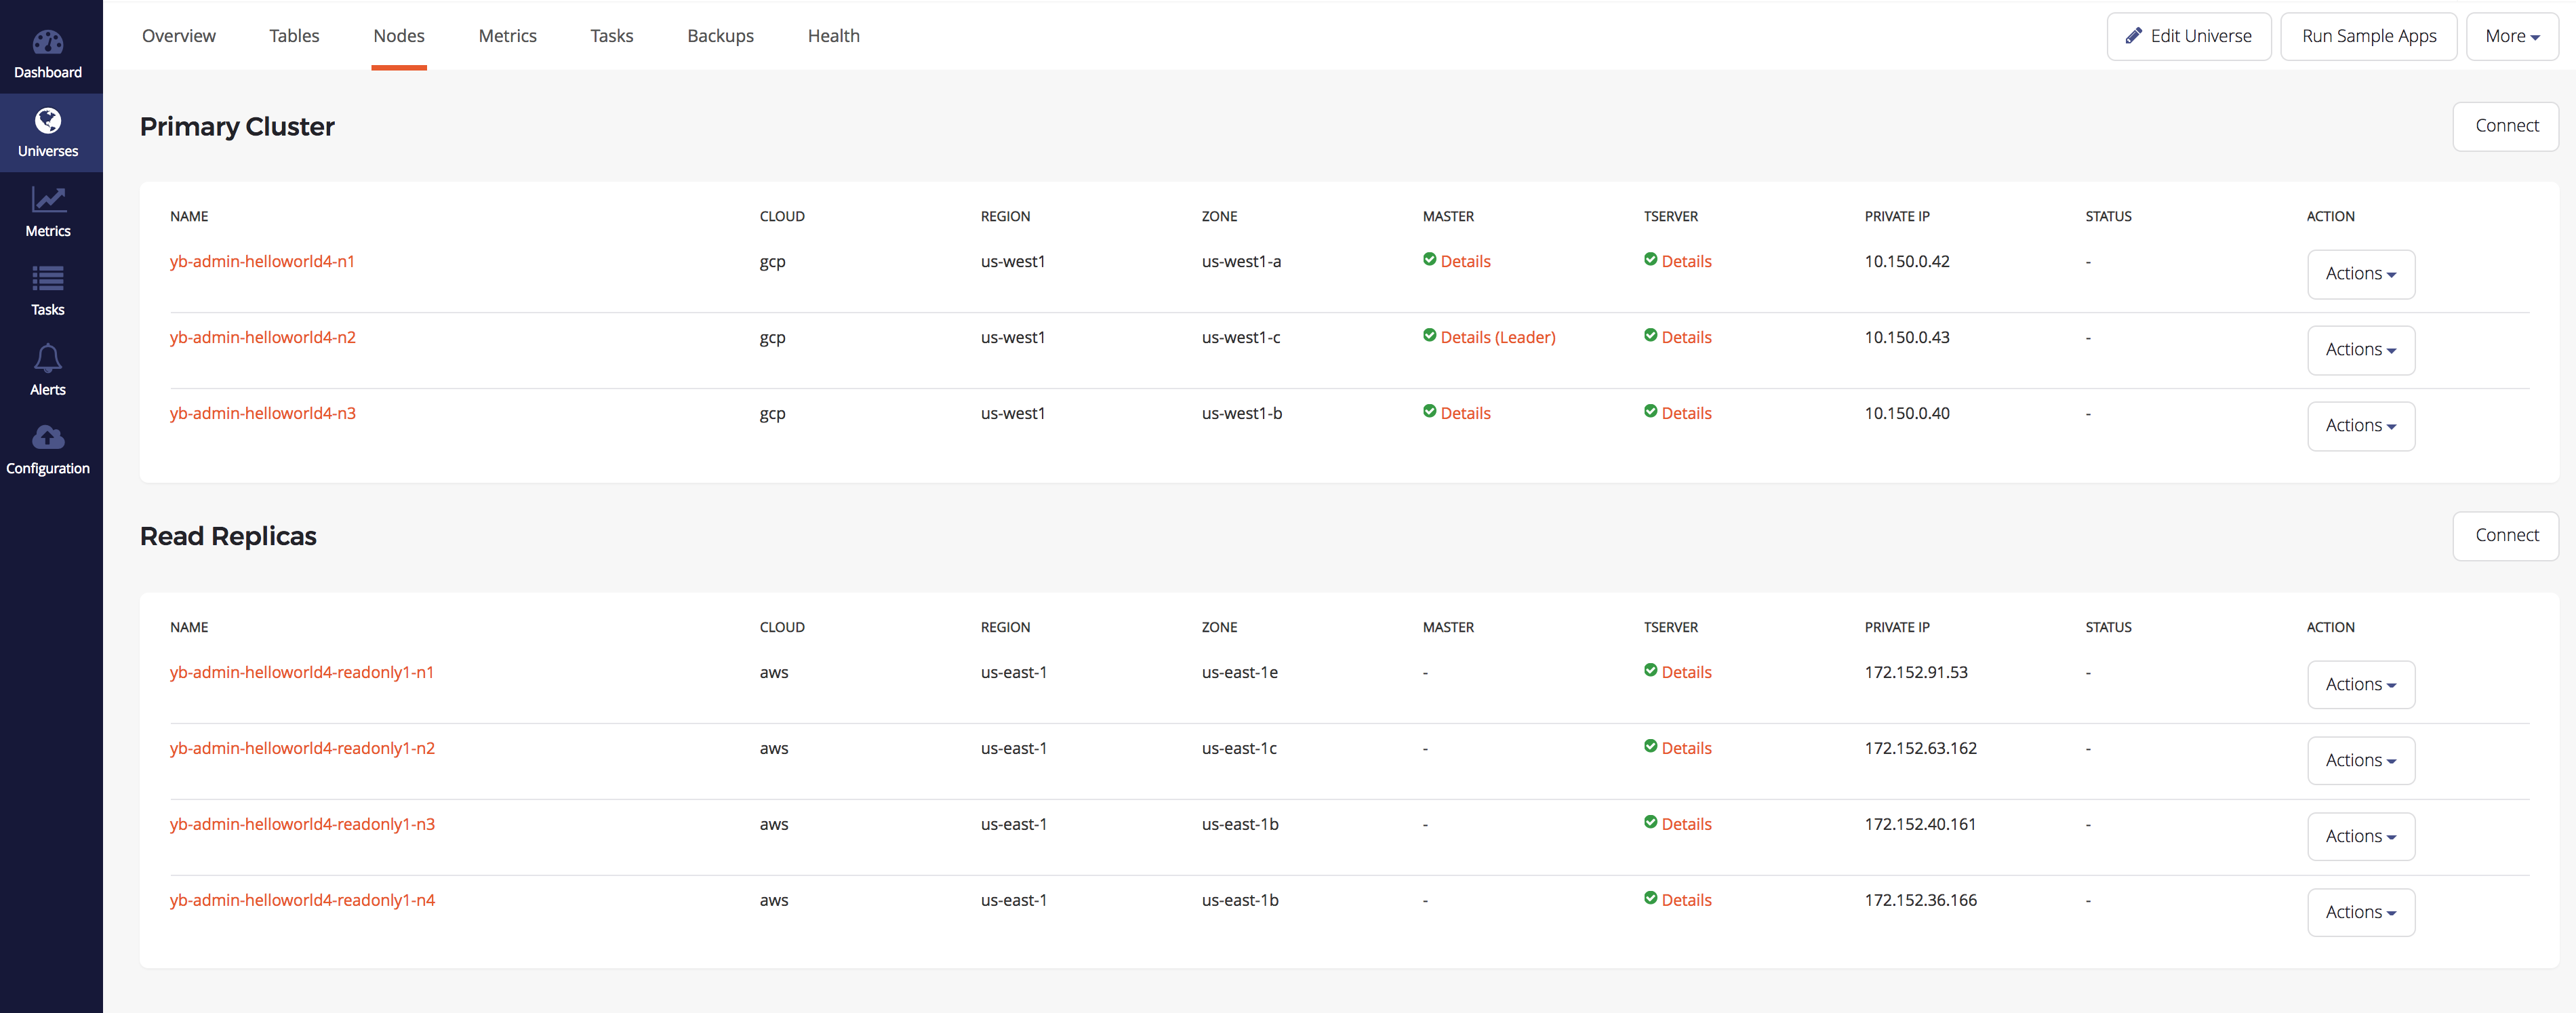
You can browse to the Nodes tab of the universe to see a list of nodes. Note that the nodes are grouped by primary or read replica, and read replica nodes have a readonly1 identifier associated with the name.
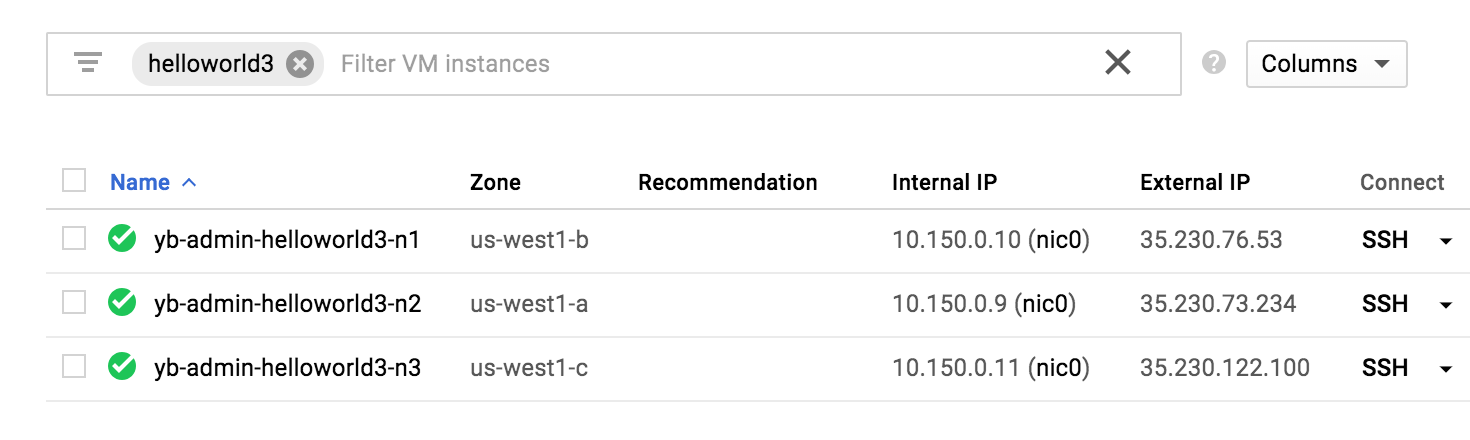
Go to the cloud provider's instances page. In GCP, browse to Compute Engine -> VM Instances and search for instances that have helloworld3 in their name. You should see something as follows, corresponding to our primary cluster.
In AWS, browse to Instances and do the same search, you should see three nodes corresponding to our read replica cluster.

We have successfully created a hybrid cloud deployment with the primary cluster in GCP and the read replica cluster in AWS!
Add, remove, edit a read replica cluster
This section covers dynamically adding, editing, and removing a read replica cluster from an
existing universe. Let's create a new universe helloworld4 with a primary cluster exactly as helloworld3 but without any read replica cluster. Click Create and wait for the universe to be ready. Once this is done,
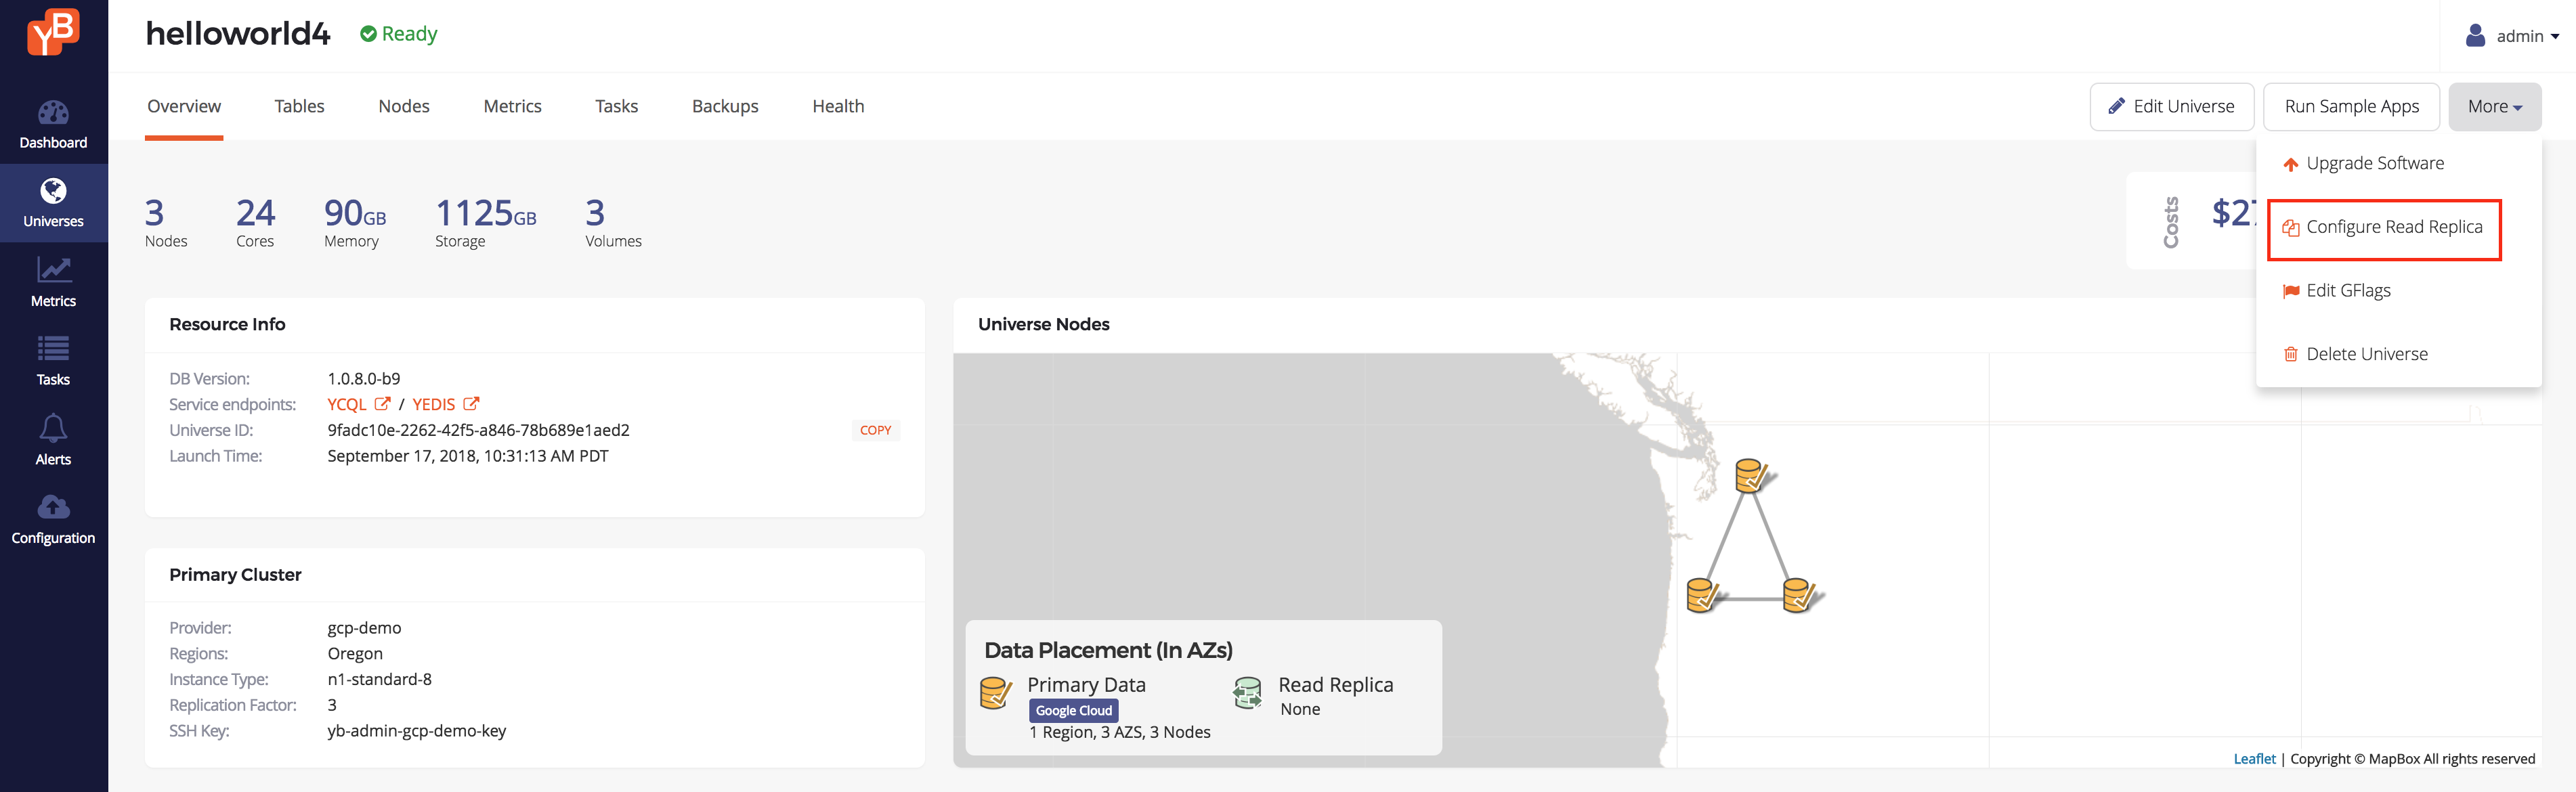
navigate to the Overview tab, and find the More drop-down list in the top right corner. There you should
find the Configure Read Replica selection and click on that.
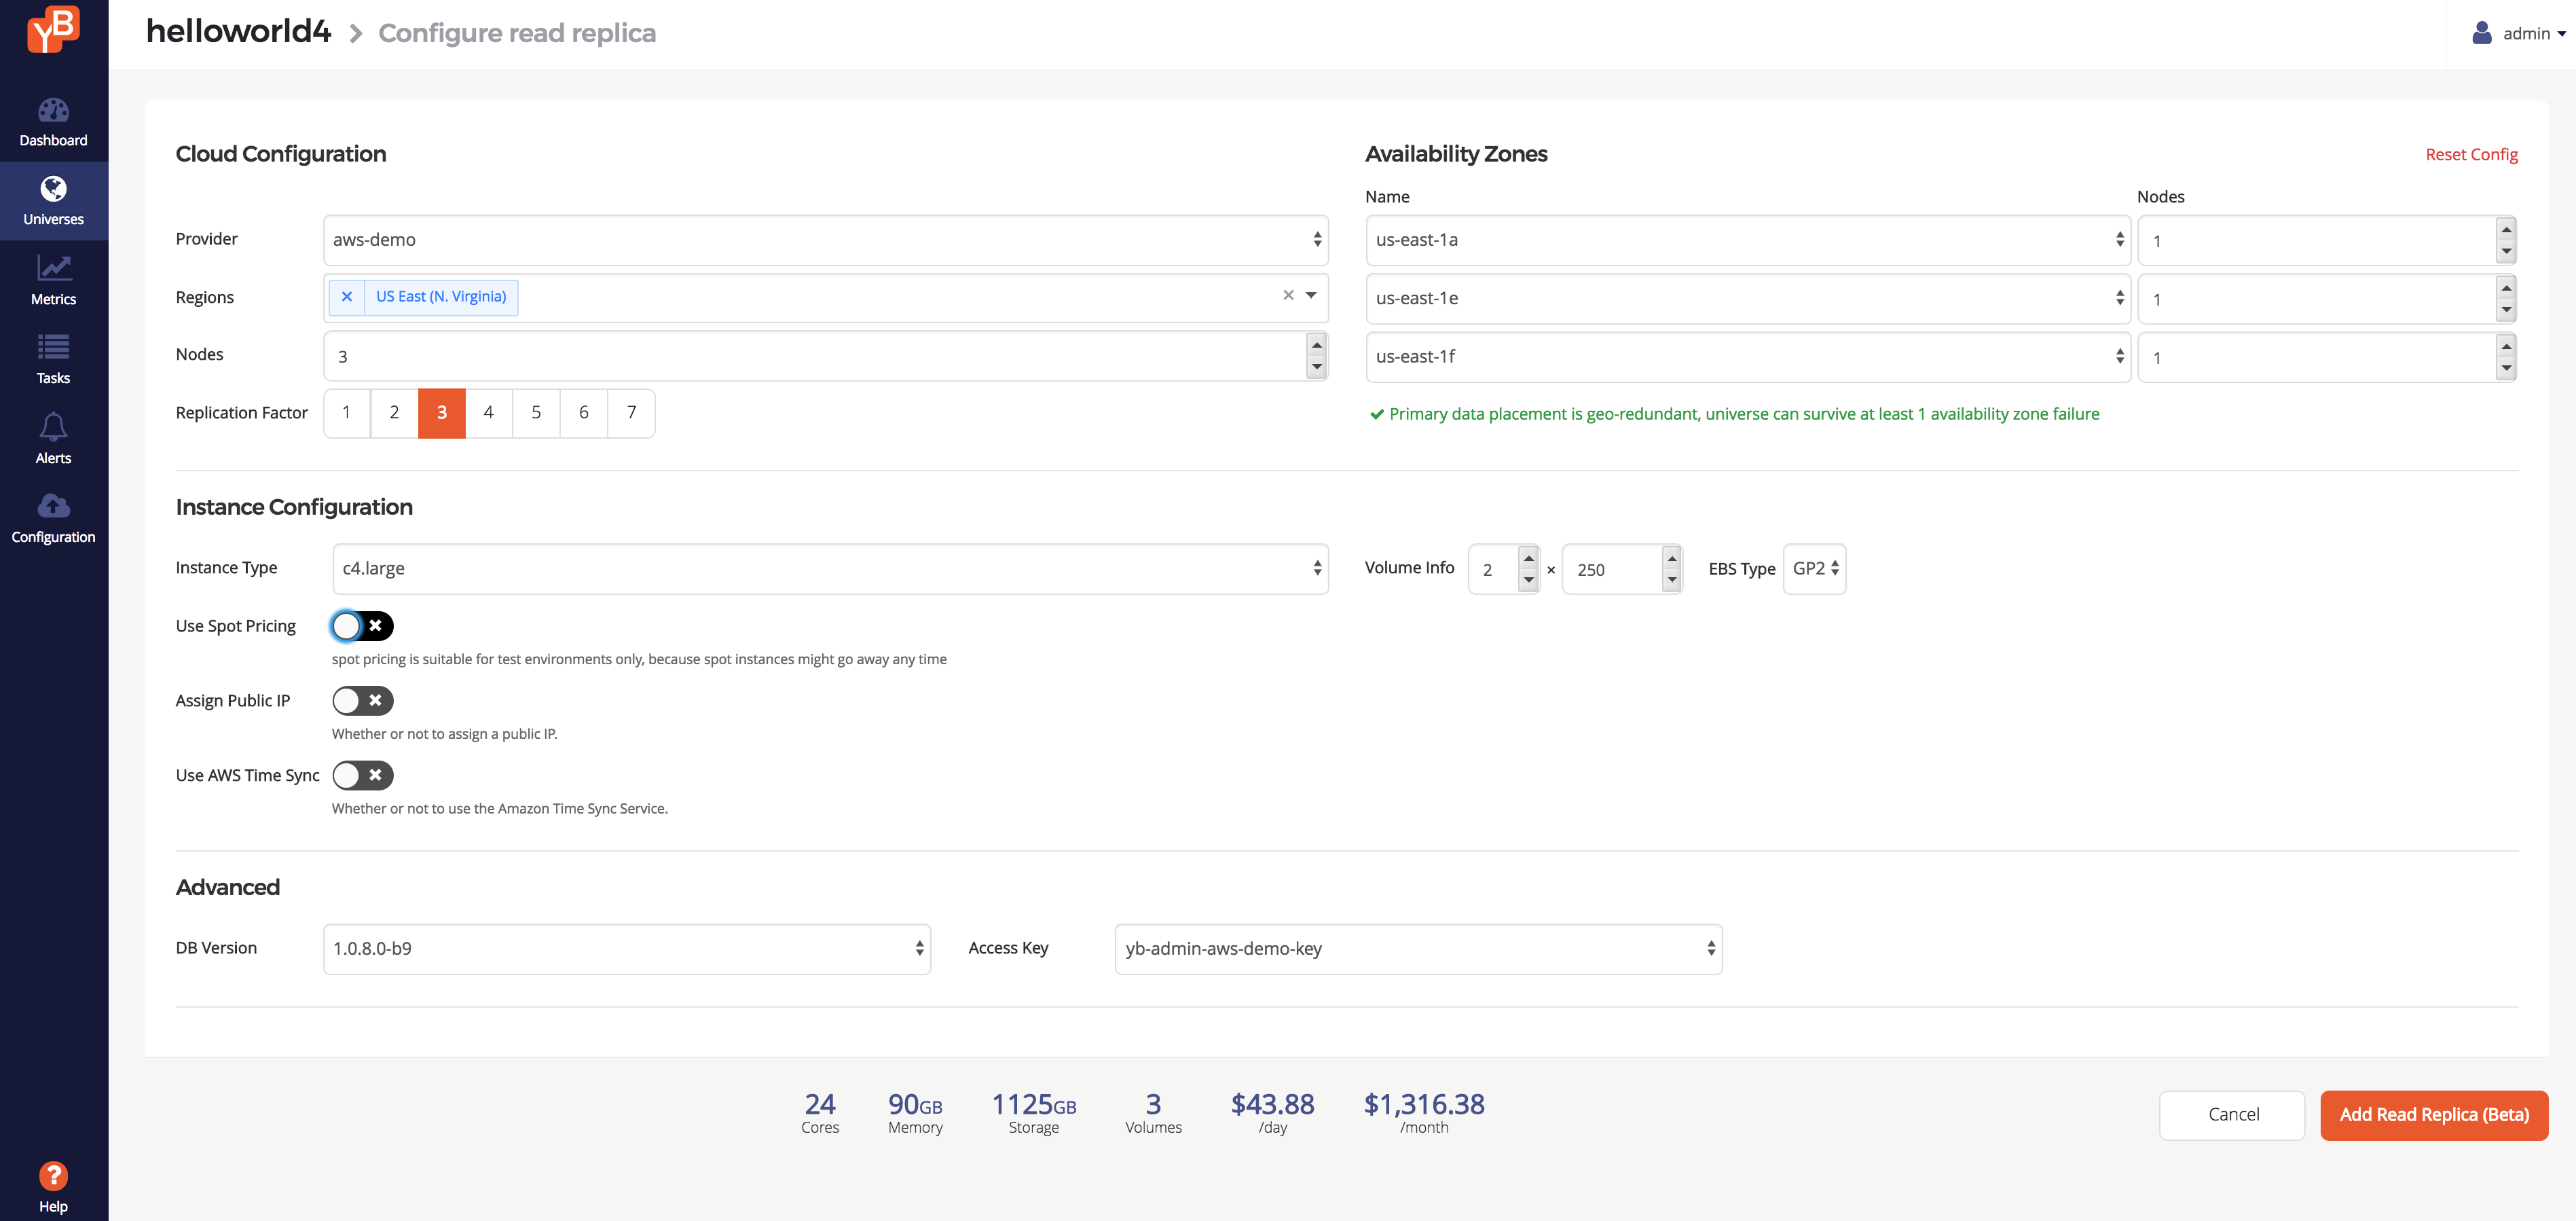
You will see a page to configure the read replica cluster. Enter the same intent you used for the
read replica cluster in helloworld3 and click Add Read Replica.
Once this is done, go to the Nodes tab and verify that you have three new read replica nodes, all in AWS. To edit the read replica cluster, go back to the More dropdown and select Configure Read Replica. Add a node to the cluster (it will automatically select an Availability Zone to select from) and click Edit Read Replica.
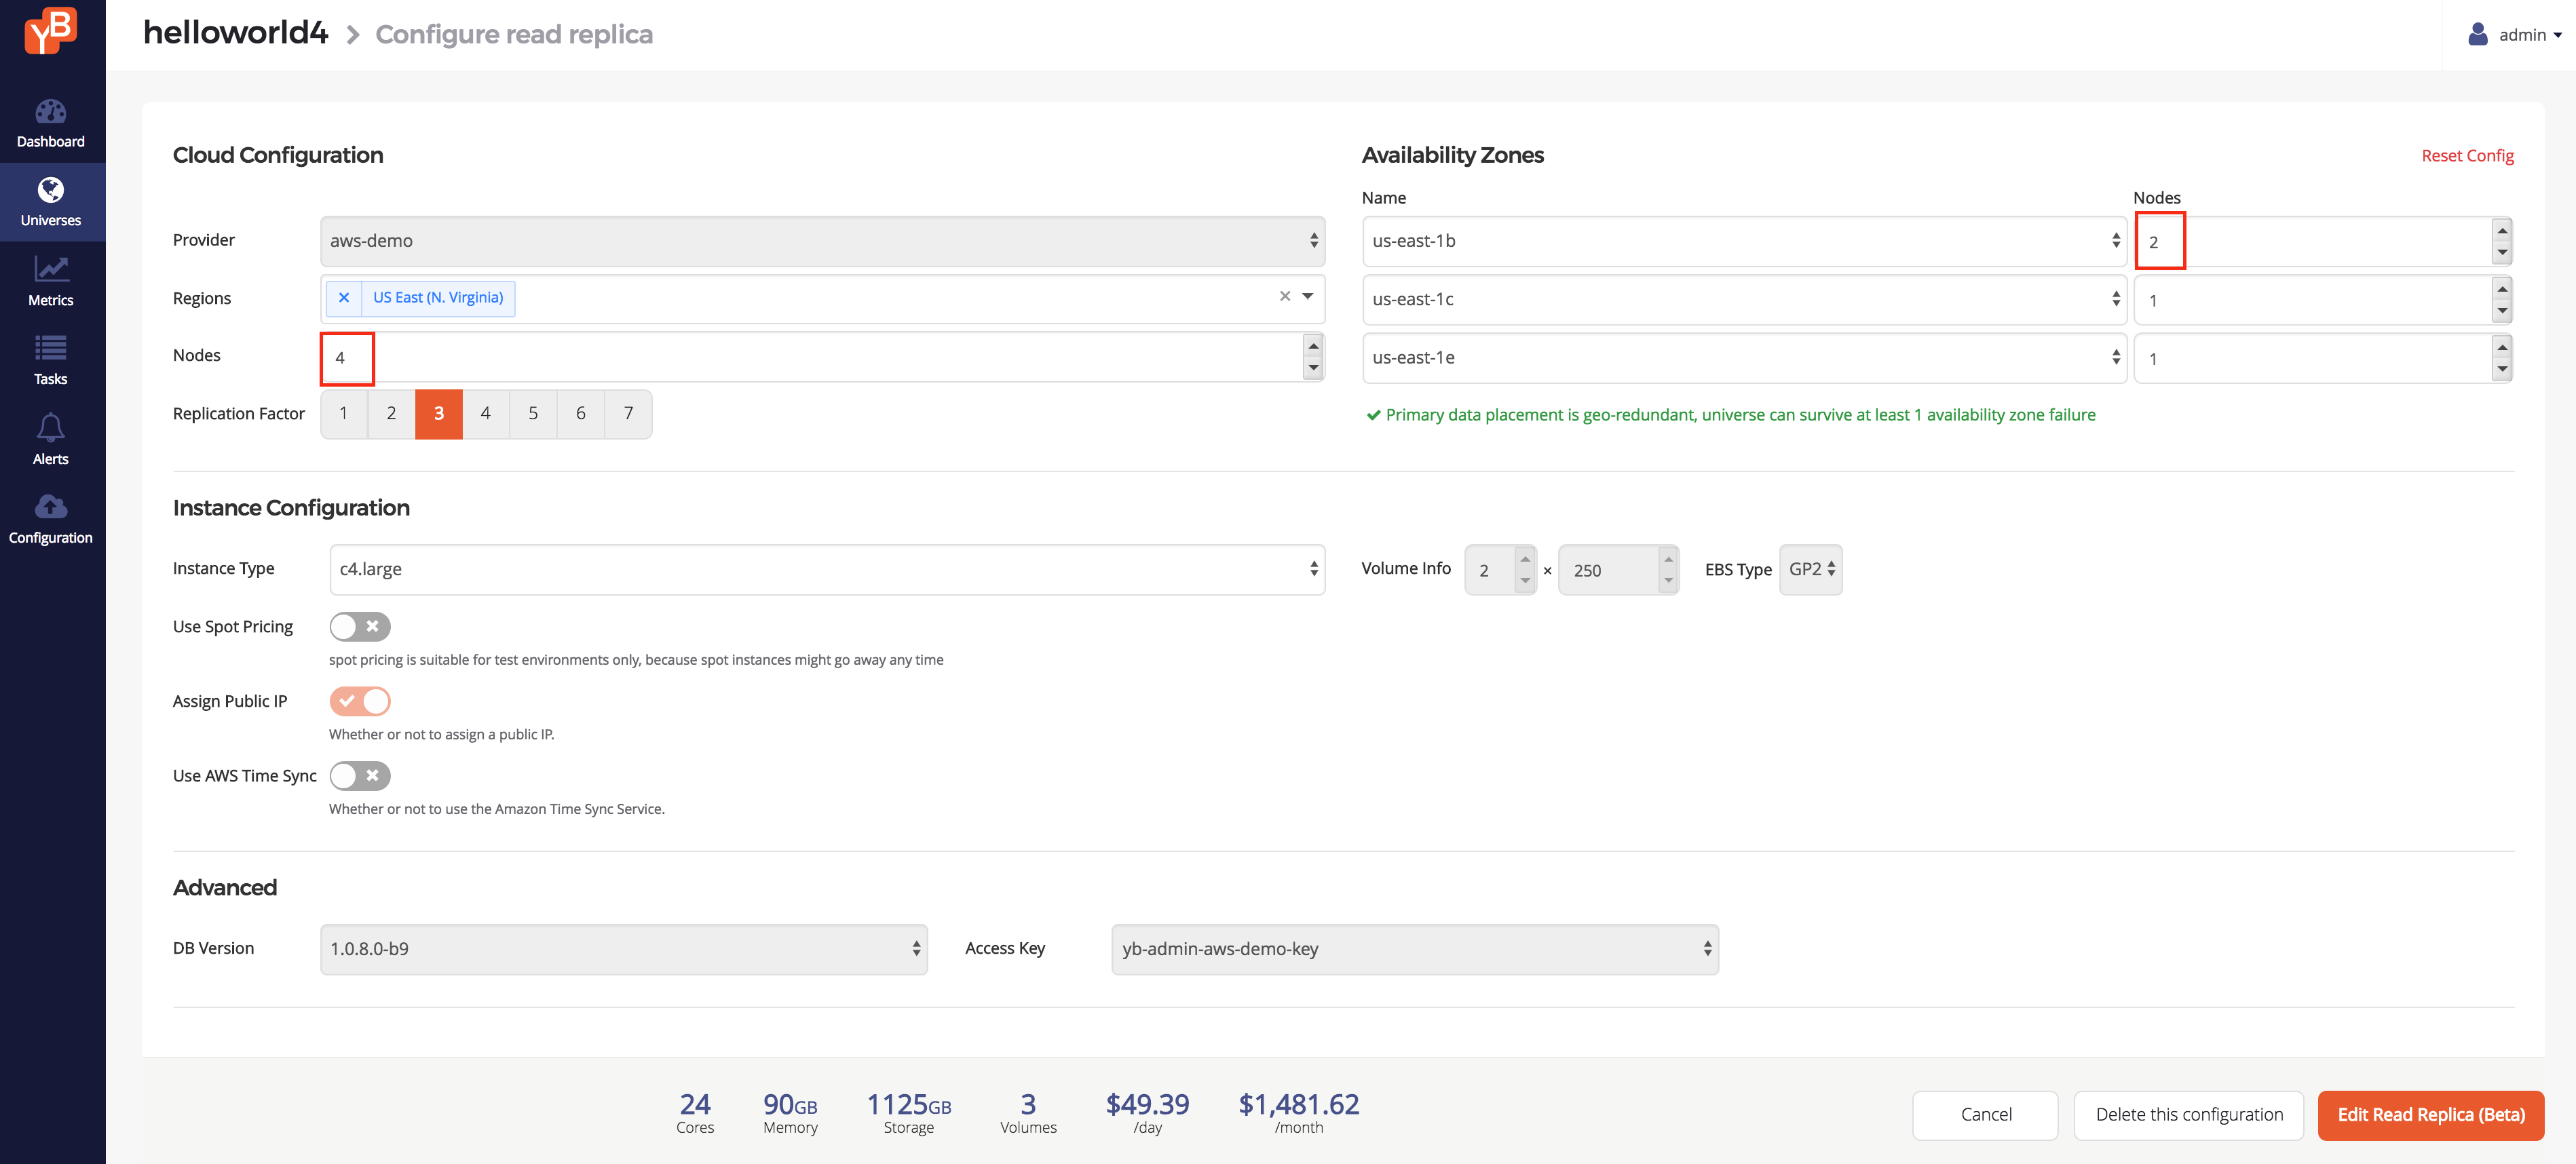
Once the universe is ready, go to the Nodes tab and you can see the new read replica node for a total of four new nodes.
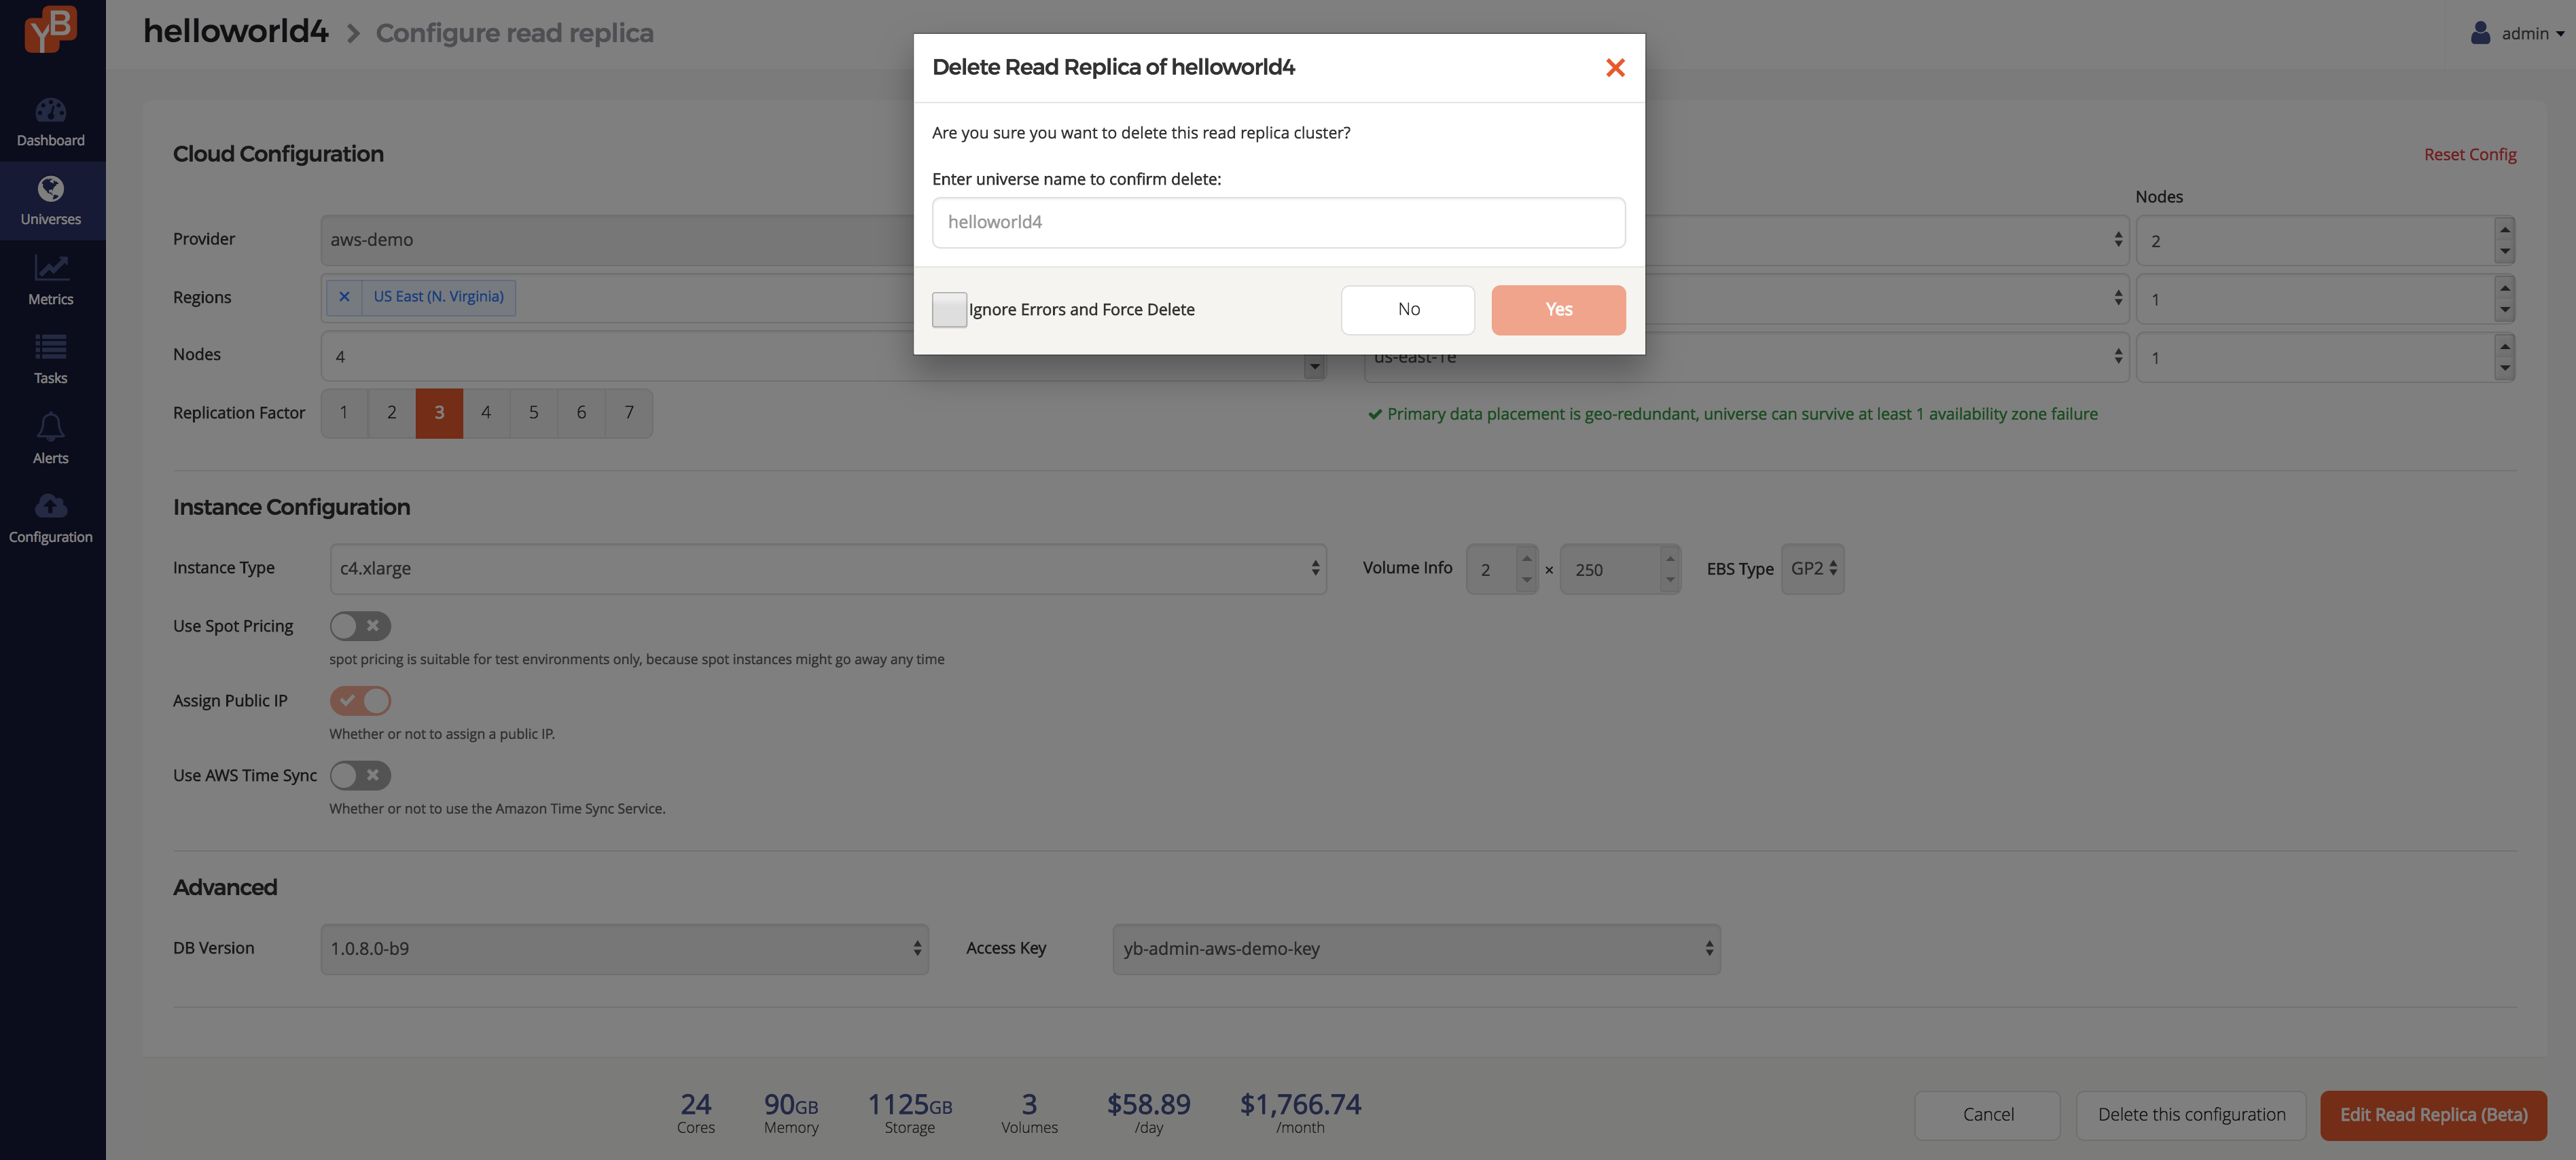
Finally, to delete the read replica cluster, go back to the Configure Read Replica page and click Delete this configuration. You will be prompted to enter the universe name for safety purposes. Do this and press Yes.
Once this is done, go back to the Nodes page and verify that you only see the three primary nodes from the initial universe creation. You have dynamically added, edited, and removed a read replica cluster from an existing universe.